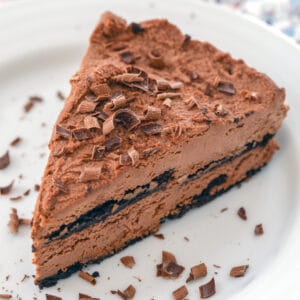
Chocolate Ricotta Cake
This Chocolate Ricotta Cake is a no-bake dessert that can be prepared up to two days in advance. It's incredibly rich and creamy and will delight any chocolate fan!
Print
Pin
Makes: 8 servings
Ingredients
- 12 oz. semisweet chocolate (not chocolate chips), roughly chopped (plus more for shaving on top)
- 2 15-oz. containers part-skim ricotta cheese
- 1 tsp espresso powder
- 2 Tbsp vanilla extract
- ¾ cup heavy cream
- 1 9-oz. package chocolate wafer cookies
Instructions
- Remove the sides of a 9-inch springform pan and place a sheet of waxed paper on the bottom, leaving an overhang. Lock the sides in to secure the paper and spray the inside of the pan with cooking spray. Then line the sides with a strip of waxed paper (28 inches long and 4 inches wide).
- Place chocolate in the bowl of a double burner or in a heatproof bowl set over a pan of simmering water. Stir occasionally until the chocolate is melted.
- Place ricotta in a food processor and blend until it’s smooth, about one minute. Add the melted chocolate and blend until smooth. Mix in the espresso and vanilla, too.
- In a large bowl, use a hand mixer (or whisk) to beat the heavy cream until stiff peaks form. Fold it into the chocolate-ricotta mixture.
- Place half the chocolate wafer cookies in an overlapping fashion on the bottom of the springform pan. Spoon half the chocolate ricotta mixture over the cookies. Arrange the remaining cookies on top of the chocolate ricotta mixture and spoon the remaining ricotta mixture on top, smoothing it out as much as possible.
- over the pan in plastic wrap and refrigerate for at least 6 hours or up to 2 days.
- When ready to serve, release the sides of the pan and peel away the waxed paper from the sides of the pan. Life cake onto a platter and remove the waxed paper from the bottom as you’re lifting the cake. Shave additional chocolate over the top.
Notes
- Recipe lightly adapted from Martha Stewart's Everyday Food.
Share a Photo of Your Finished Recipe!Mention @wearenotmartha and share a photo if you've made the recipe!