
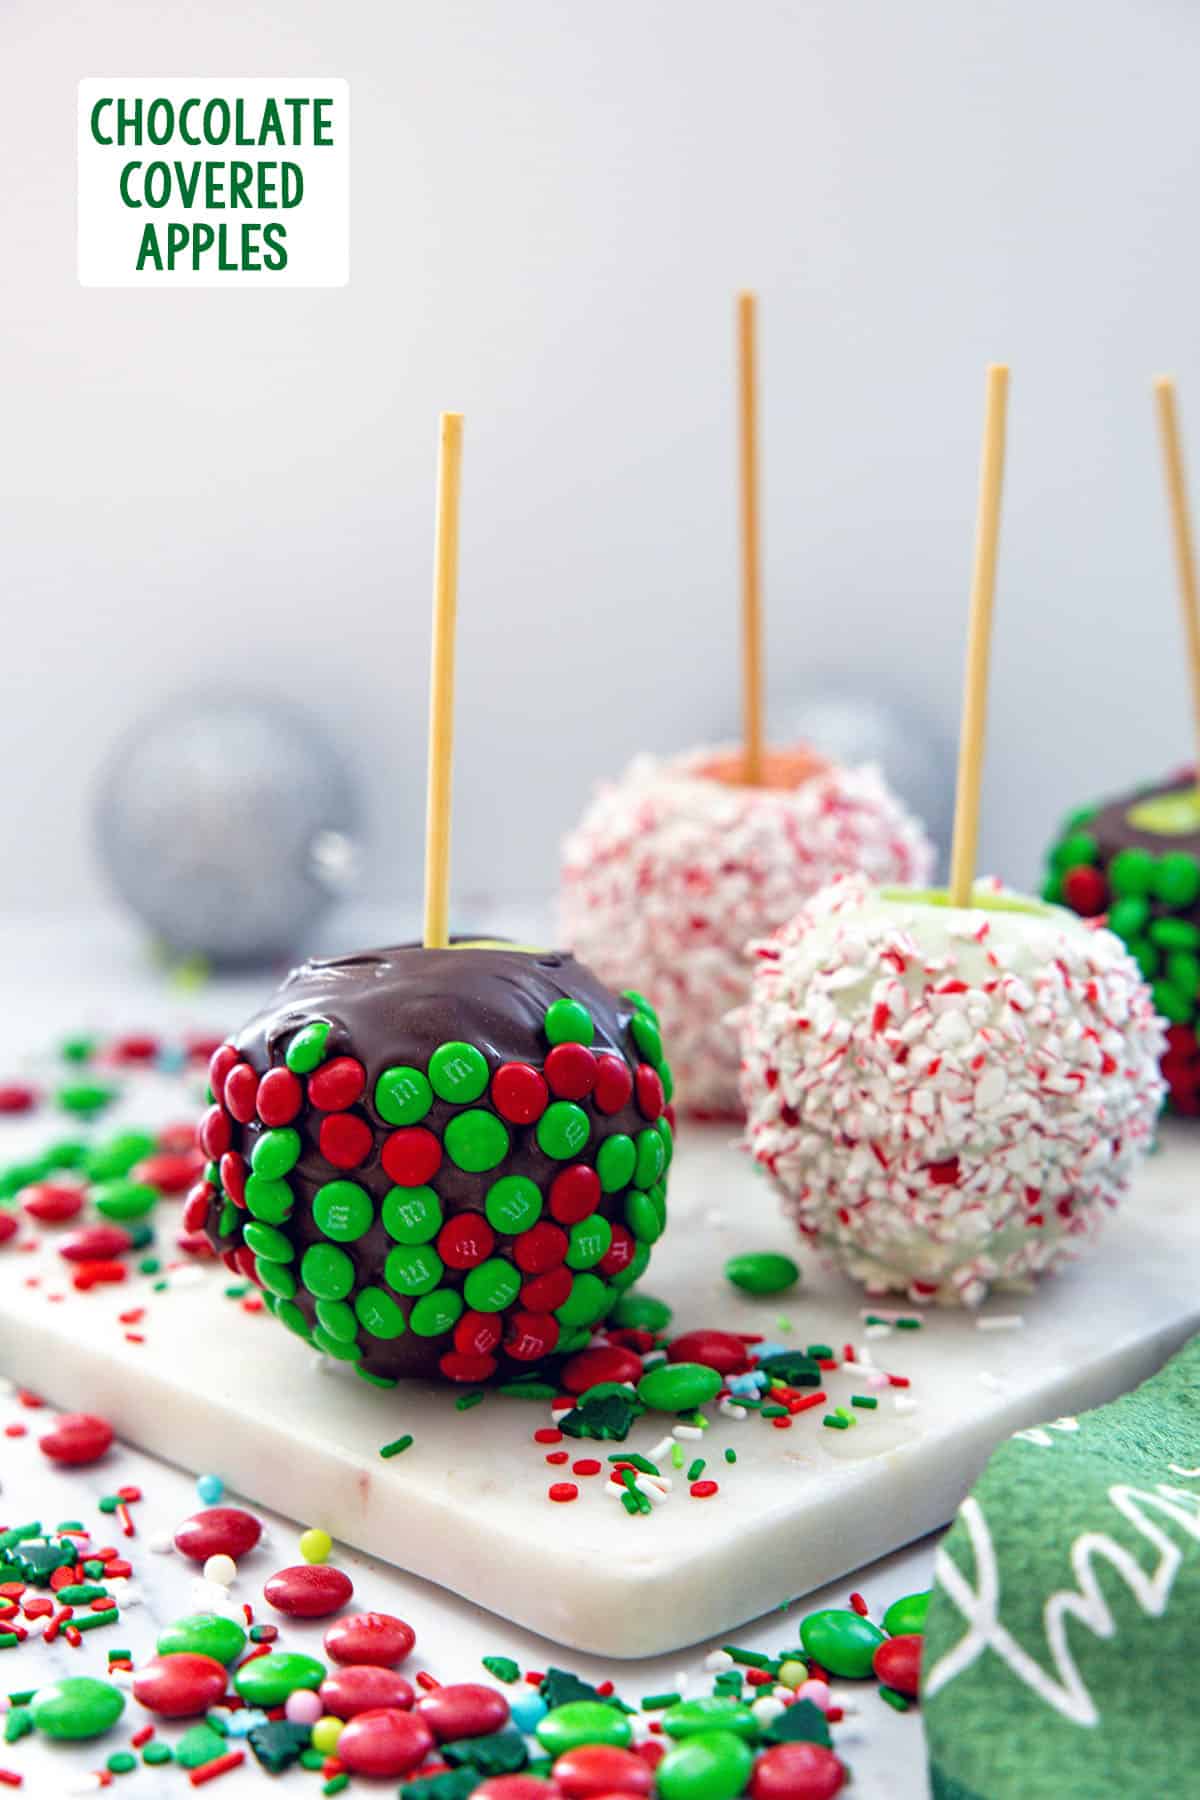
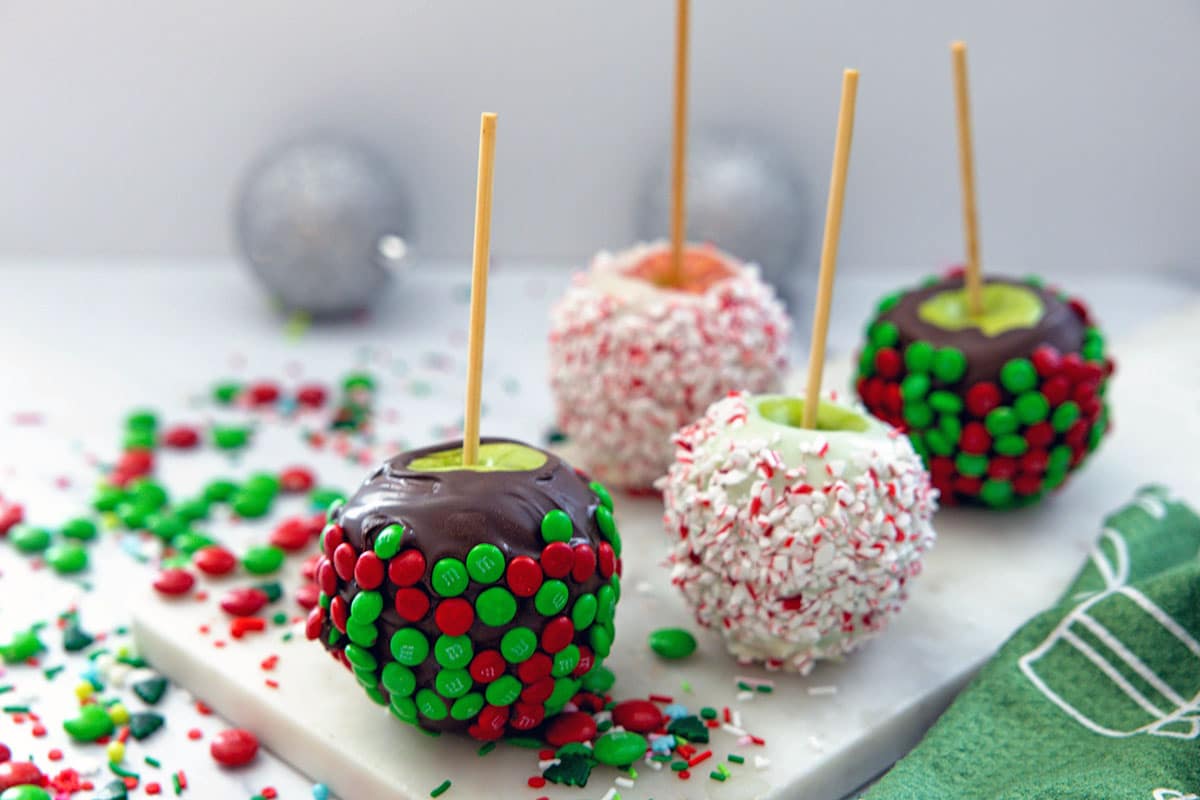
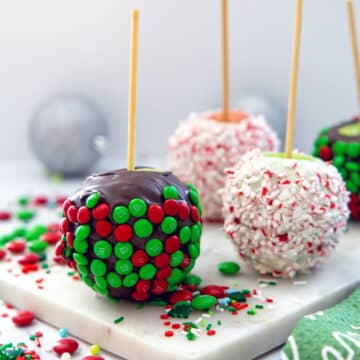
With just a few simple ingredients, you can make delicious chocolate covered apples, perfect as holiday party dessert or to gift as thoughtful homemade treats. This easy recipe lets you customize your apples with various toppings, making them suitable for any occasion year-round.
Jump to:
There are some holiday treats you can spend a lot of money on to serve at parties or to bring as host/hostess gifts.
And there are some you can easily make at home just as good as they do in a candy shop!
Chocolate covered apples are so easy to make at home with a few simple ingredients. They're absolutely delicious and they can be customized however you want them!
🍫 Ingredients & equipment
Both the ingredients and the "equipment" for chocolate covered apples are quite basic. Here's everything you need (be sure to view the recipe card at the bottom of this post for ingredient amounts and full recipe instructions):
- Apples: I recommend granny smith because the tart pairs well with sweet chocolate, but you can use any kind you prefer
- Chocolate melting wafers or high-quality chocolate bars: you can either coat your apples with milk chocolate, dark chocolate, or white chocolate. I used both milk chocolate melts and white chocolate melts for mine. You could even use red or green candy melts/melting wafers if you prefer. I don't recommend using chocolate chips as they're harder to melt.
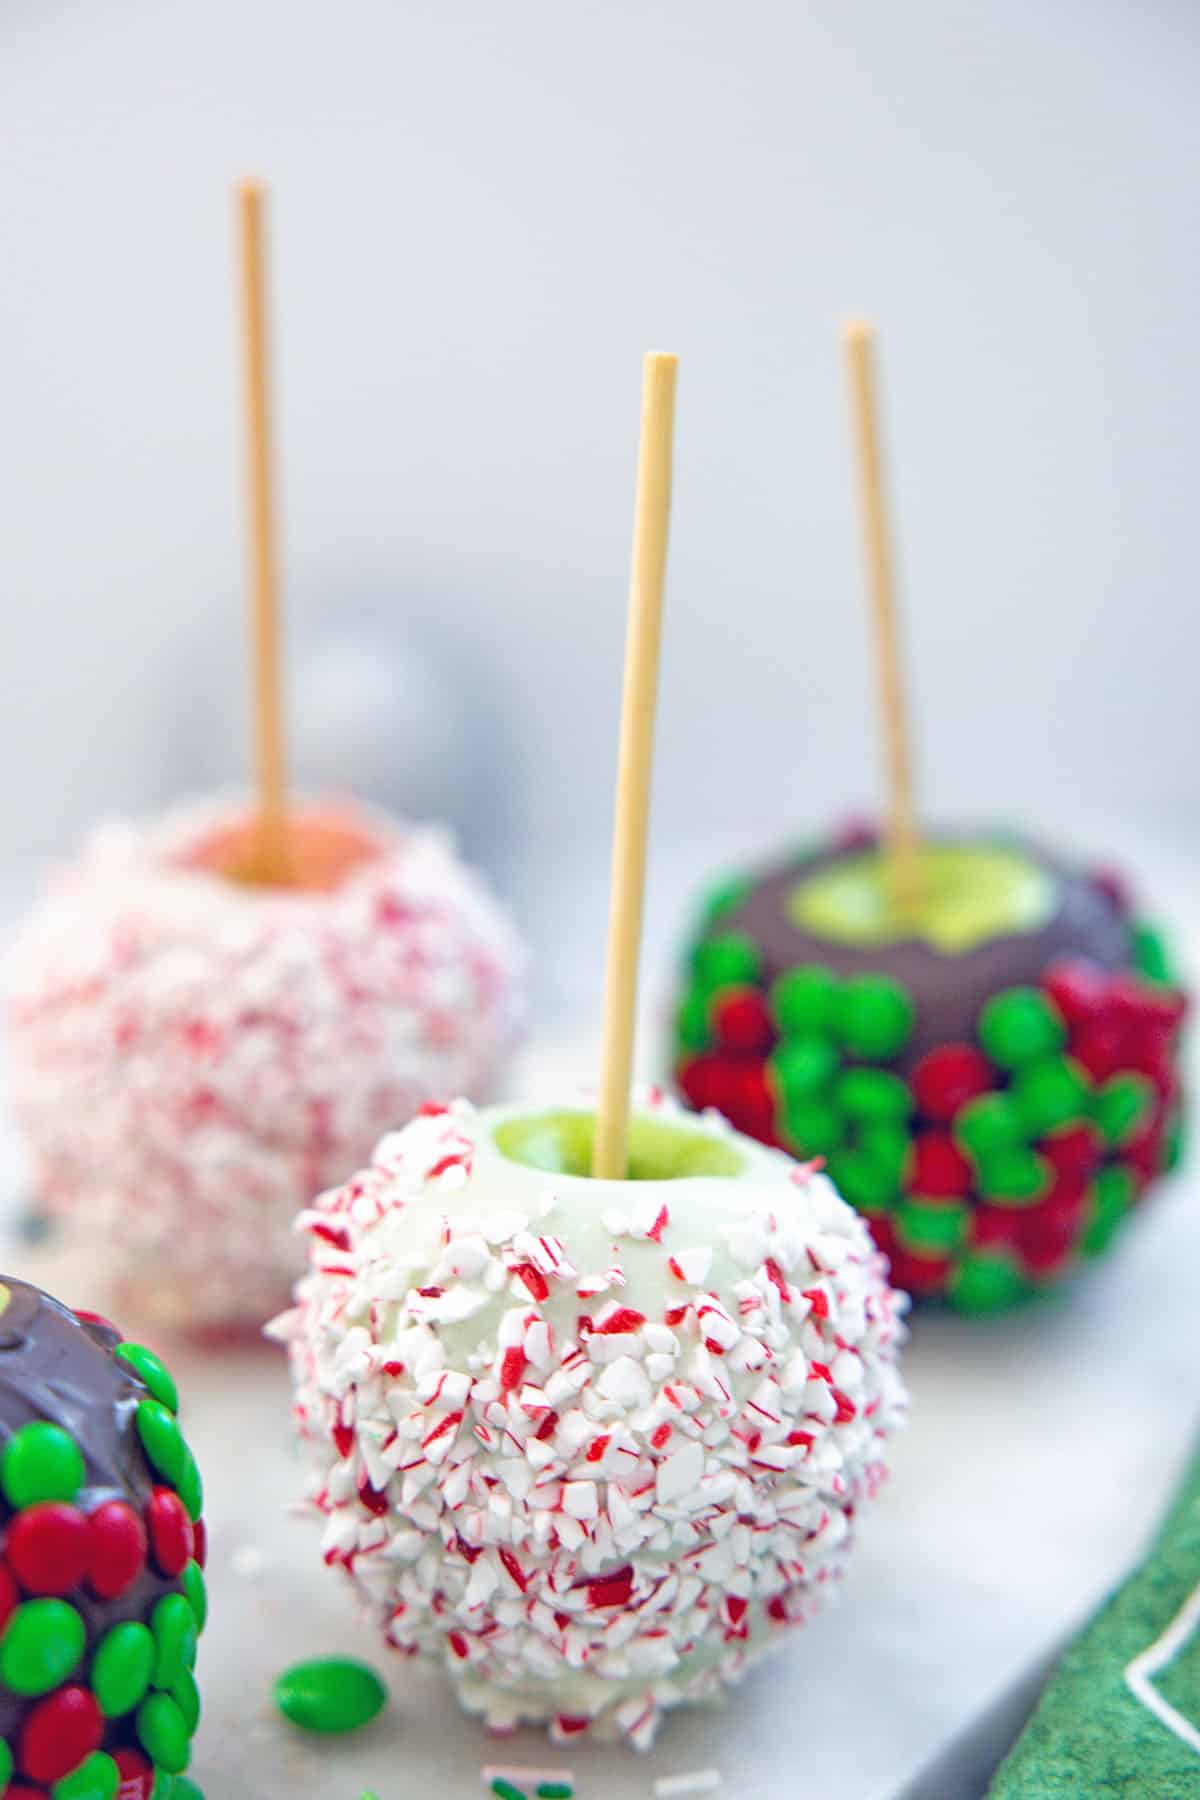
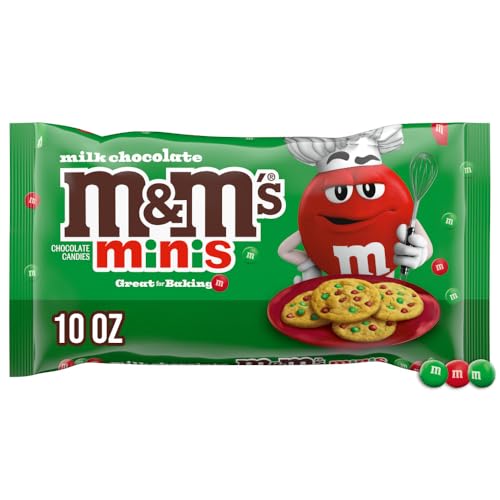
- Toppings: you can add anything you want to your chocolate covered apples. I used holiday mini M&Ms and crushed candy canes, but you can also use sprinkles, crushed nuts, mini chocolate chips, etc.
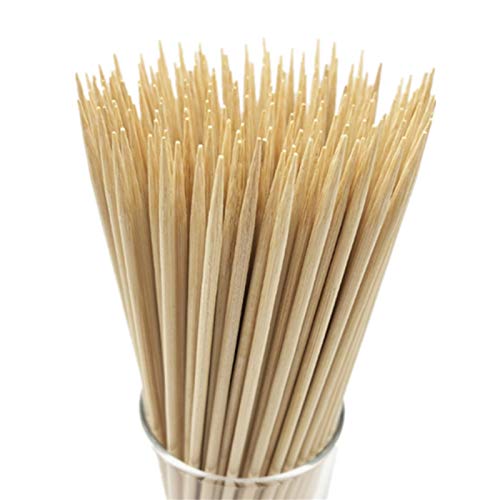
- Bamboo skewers: you'll want to put your chocolate covered apples on a stick and I recommend these 6-inch bamboo skewers.
One other tool that's helpful to have is a double boiler. You can melt your chocolate in the microwave if you prefer, but a double boiler makes it so much easier!
🍎 How to make
Now that you have all your ingredients obtained, you're ready to make these simple apples.
Be sure to wash your apples and then dry them thoroughly. You'll also want to make sure they're at room temperature as condensation can form if they're too cold.
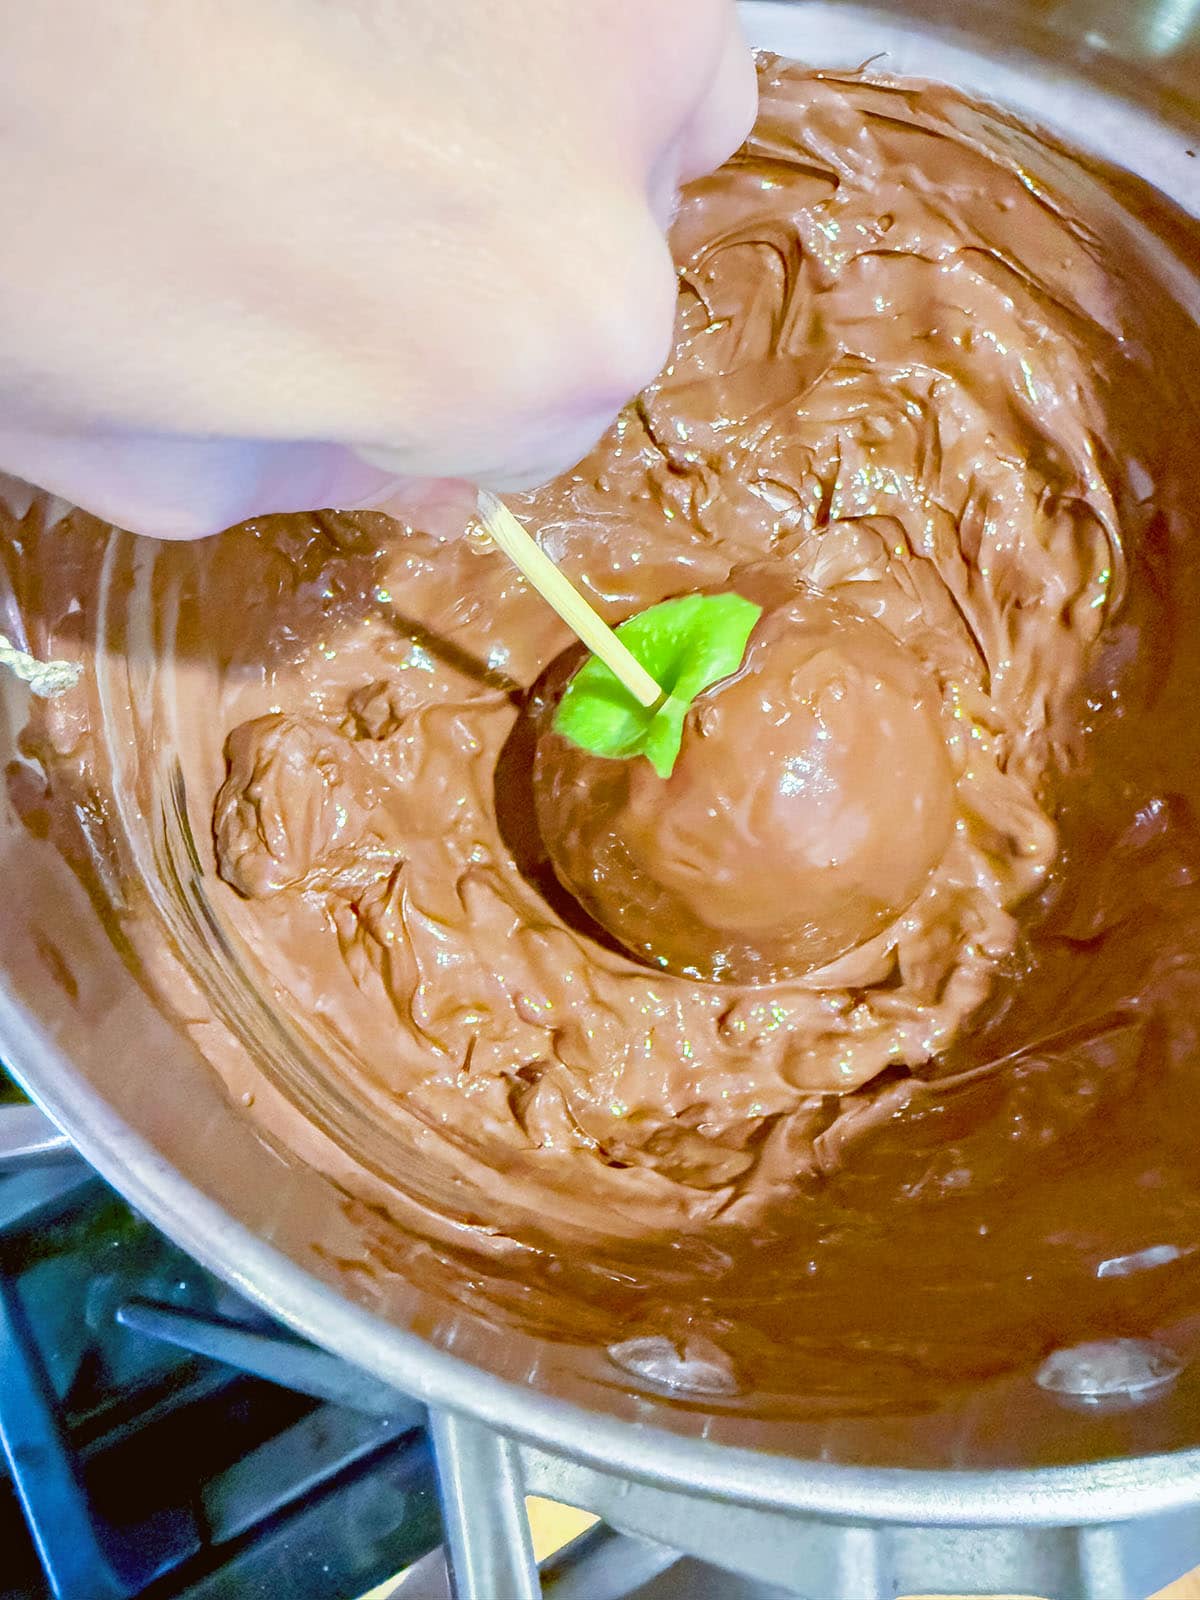
Remove the apple stems and insert your wooden skewers into the top of each apple where the stem was. Press it all the way down.

Melt your chocolate. I recommend about two cups of chocolate wafers for six apples.
Melting chocolate is easiest to do in a double boiler (if you don't have one, you can make your own by setting a heat-proof bowl over a pot of gently simmering water).
But if you're using the microwave, I recommend using 50% power for 1 minute and then stirring before placing back in the microwave and using 50% heat for 30 seconds. Take out and stir. Continue this process until the chocolate is completely smooth and melted.
In both cases, if the chocolate seems too thick, mix in a little coconut oil.
Dip each apple in the melted chocolate and swirl it around to coat it evenly.
You may want to use a spoon to help.
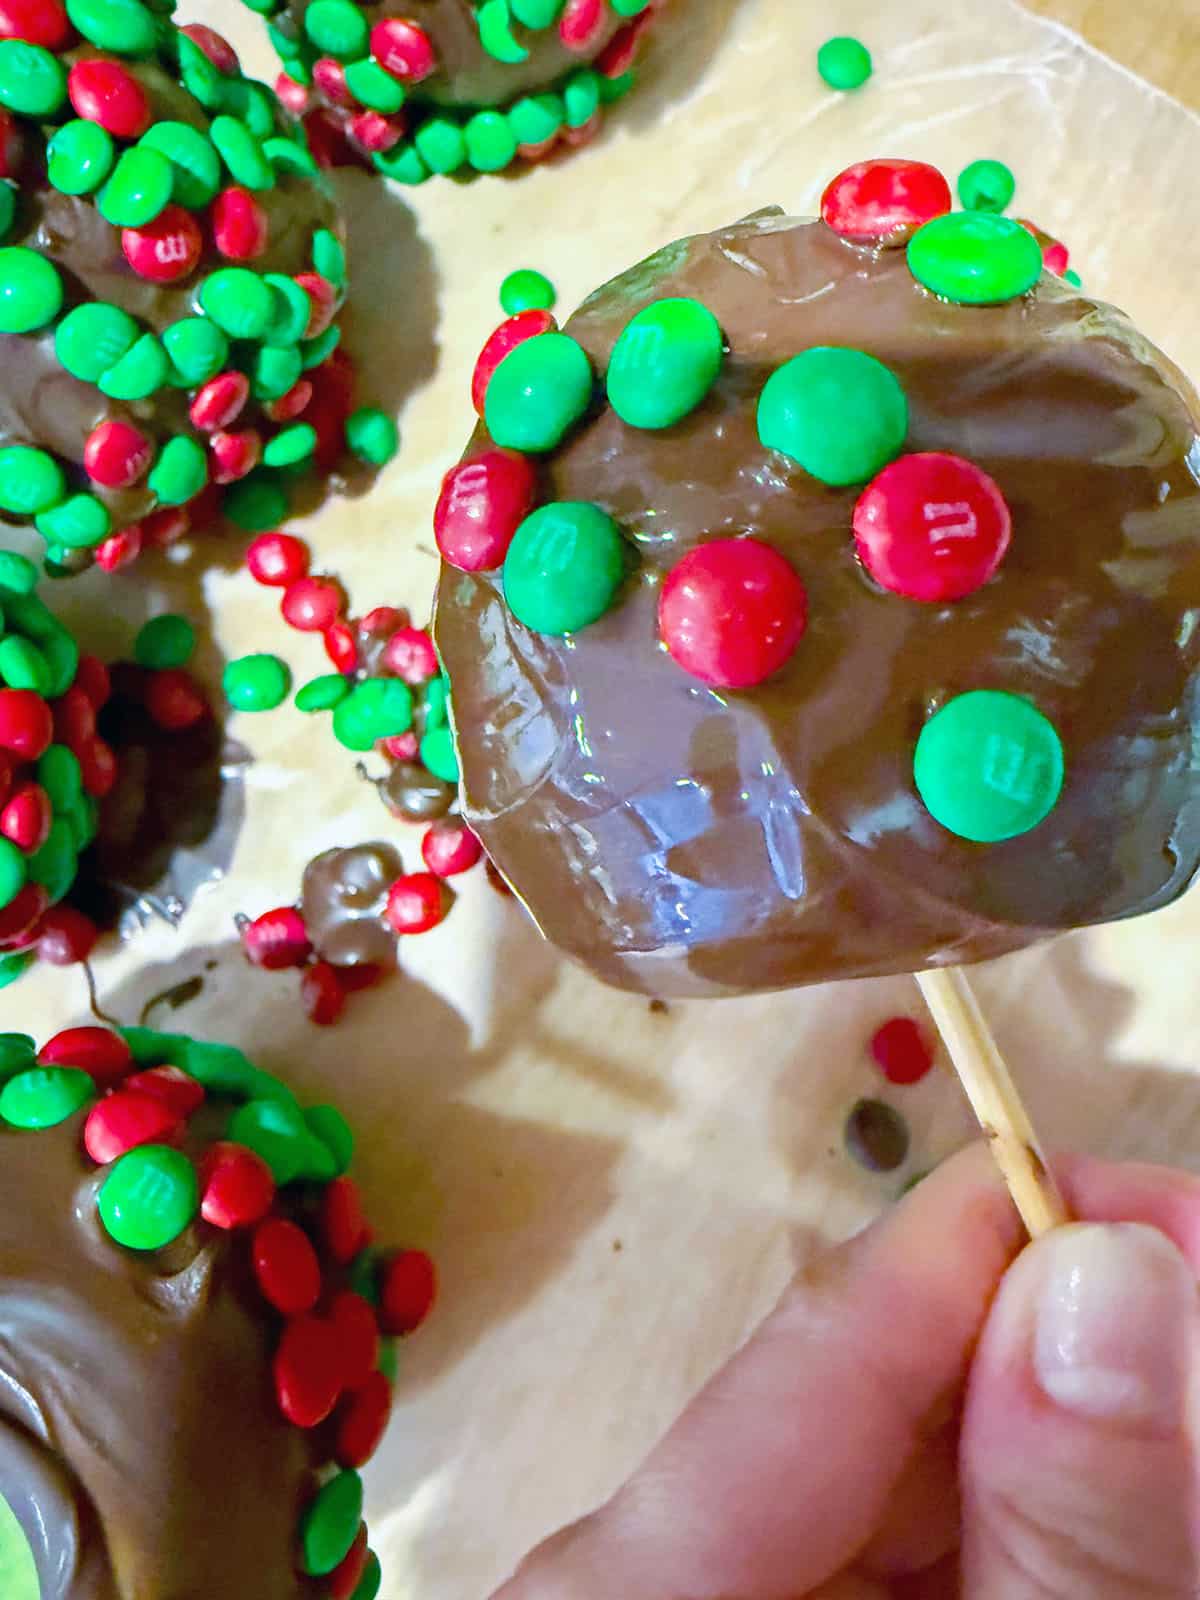
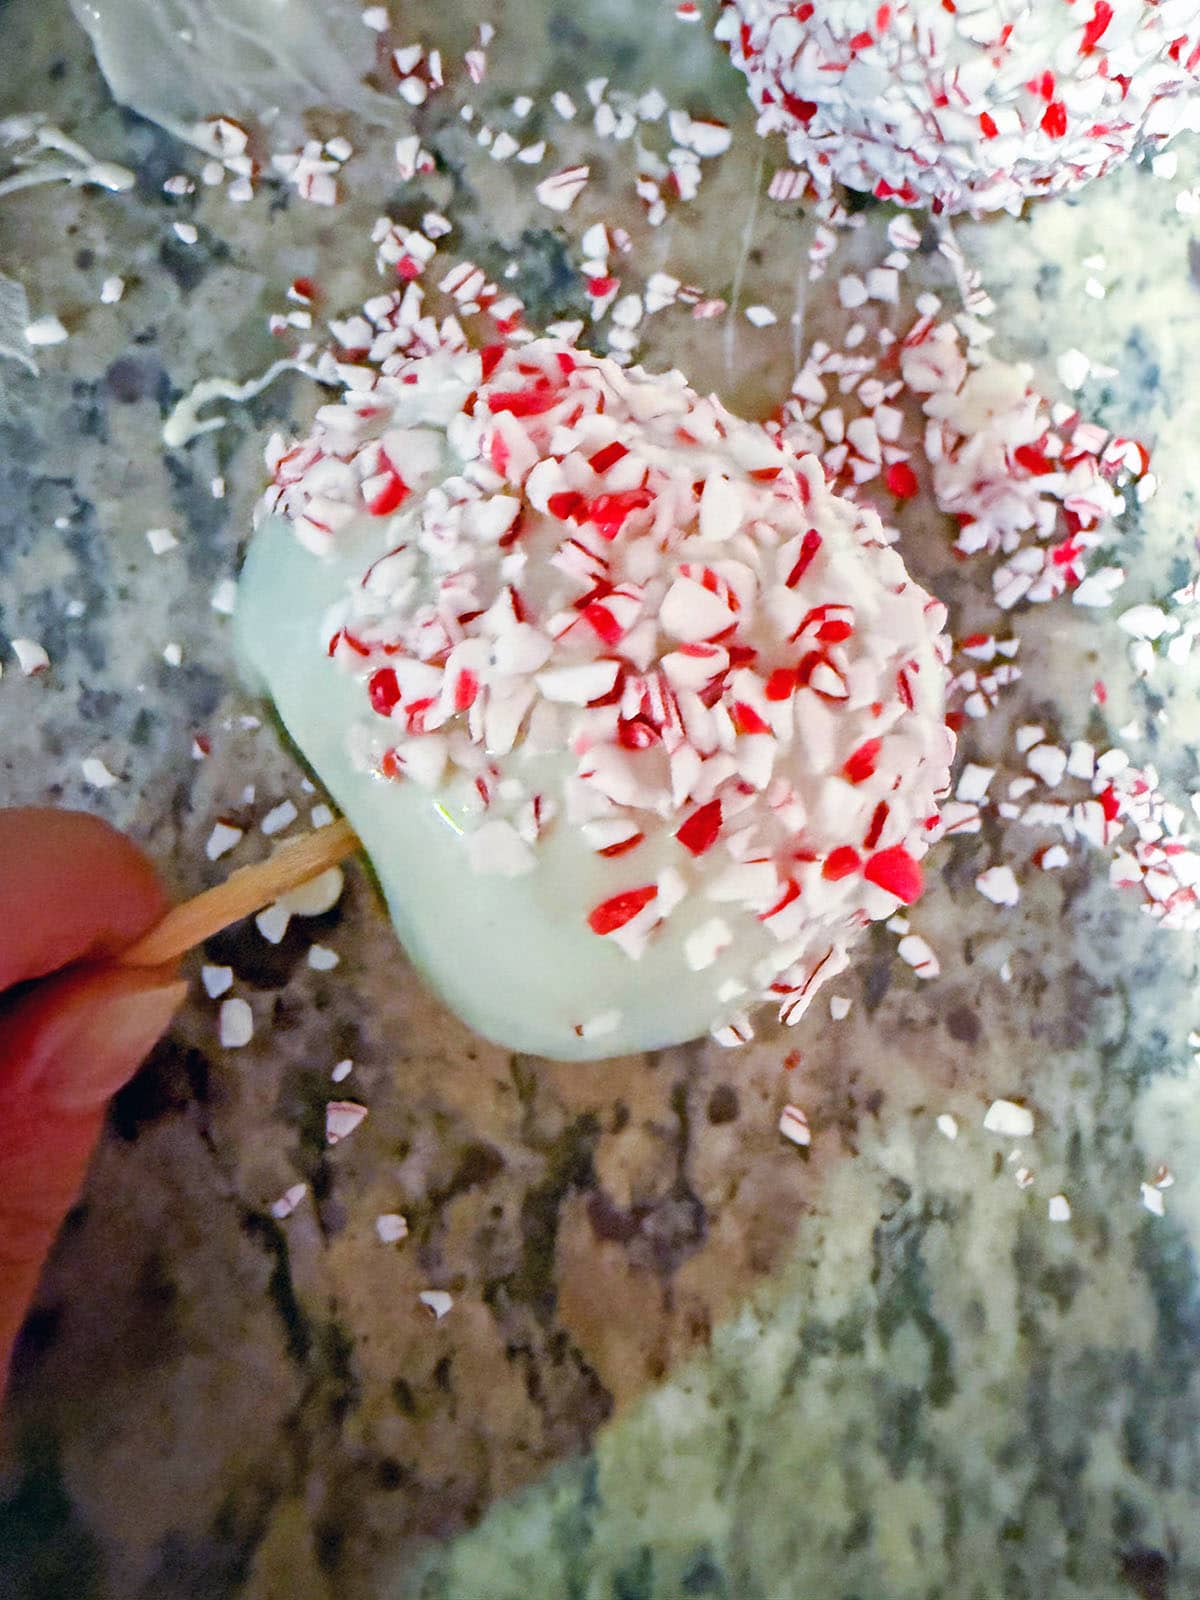
Working quickly, while the chocolate is still wet, sprinkle your toppings over your apples or roll the apple in them.
I used mini M&Ms on my milk chocolate covered apples.
And crushed candy canes on my white chocolate covered apples.
📧 Email Me This Recipe
Place the chocolate covered apples on a piece of wax paper or parchment paper and let rest until the chocolate sets, about 90 minutes.
And your apples are ready to be enjoyed! You can eat them as is or you can cut them into slices and serve them to a crowd!
In addition to looking pretty, chocolate covered apples are just so delicious. The slightly tart and fruity flavor of the apple pairs with chocolate so well.

And obviously added candy and peppermint make things even better!
⏲️ How to store
You can keep chocolate covered apples at room temperature for about 24 hours, but I recommend storing them in the fridge.
At first I was worried they'd develop condensation in the fridge, but they didn't. They should keep fresh like this for 3-4 days.
The first thing that went off on my apples was the M&Ms, which started turning white.
🔪 Tips for slicing
Sometimes slicing chocolate covered apples can be tough as the chocolate coating is wont to fall off as you slice.
Here are some tips for easier apple slicing:
- Make sure the chocolate is fully hardened before you attempt to cut the apples.
- When slicing, don't press down too hard as this can cause chocolate to crack. Apply gentle pressure and use a sawing motion to cut through the apple.
- Try running your sharp knife under hot water and then drying it before cutting. This can help slice through the chocolate more easily, melting it slightly as it cuts through.
- I recommend cutting the apple right before you're ready to serve it as once cut, the chocolate might start separating from the apple slices due to the apple's moisture being exposed.
🎉 Variations on recipe
Of course, my apples have a holiday theme, but chocolate covered apples can easily be a year-round treat and there are so many different toppings you can use and ways you can make the apples!
Here are some ideas:
- Sprinkles: use holiday themed sprinkles to fit any occasion or stick to rainbow sprinkles.
- Chopped nuts: I like walnuts, pecans, or pistachios best.
- Candy: Reese's pieces, regular M&Ms, crushed candy bars, etc.
- Crushed cookies: Oreo cookies, graham crackers, chocolate chip cookies, etc.
- Coconut
- Colored chocolate: you can use any color candy melts to dip your apples in.
- Marbled chocolate: use two different kinds of chocolate and marble them together for a fun look.
- Caramel drizzle: once the chocolate is set, add a caramel drizzle.
- Decorate to fit a theme or event: if you're feeling artistic, you can decorate your apples as Disney, cartoon, or video game characters or anything that fits a party event, like these bride and groom apples.
You can make these chocolate apples suitable for any occasion under the sun!
🎄 More Christmas treat recipes
For more Christmas treats that are great for bringing to parties that are a bit more unique than the typical Christmas cookie (and that make fun host/hostess gifts!), try some of these recipes:

You can also make this homemade rock candy in red and green or the holiday colors of your choice.
I love bringing party treats that you know nobody else will be bringing!
What's a candy shop treat that you would love to make at home?
📖 Recipe
Chocolate Covered Apples
📧 Email Me This Recipe
Ingredients
- 6 large apples (I like to use granny smith)
- 6 bamboo skewers
- 2 cups chocolate melting wafers (milk, dark, or white chocolate) or about 12 ounces high-quality chocolate bars
- Toppings of choice, like mini M&Ms, crushed candy canes, sprinkles, chopped nuts, etc.
Instructions
- Wash room temperature apples and dry them thoroughly. Remove stems and insert wooden skewers into the top of each apple where the stem was. Press it all the way down.
- Melt chocolate wafers. You can either do so in a double boiler (a heat-proof bowl or pot set over a pot of gently simmering water) or in the microwave. If using the microwave, I recommend using 50% heat for 1 minute and then stirring before placing back in the microwave and using 50% heat for 30 seconds. Take out and stir. Continue until chocolate is melted and smooth.
- Dip each apple in the melted chocolate and swirl it around to coat it evenly. You can use a spoon or rubber spatula to help.
- Working quickly, while the chocolate is still wet, sprinkle your toppings over your apples or roll the apple in them.
- Place the chocolate covered apples on a piece of wax paper or parchment paper and let rest until the chocolate sets, about 90 minutes.
- To store, I recommend keeping in the fridge for 3-4 days. They should be OK at room temperature in a cool, dry spot for 24 hours.
Notes
- If the chocolate seems too thick when you melt it, mix in a little coconut oil.


Comments
No Comments