
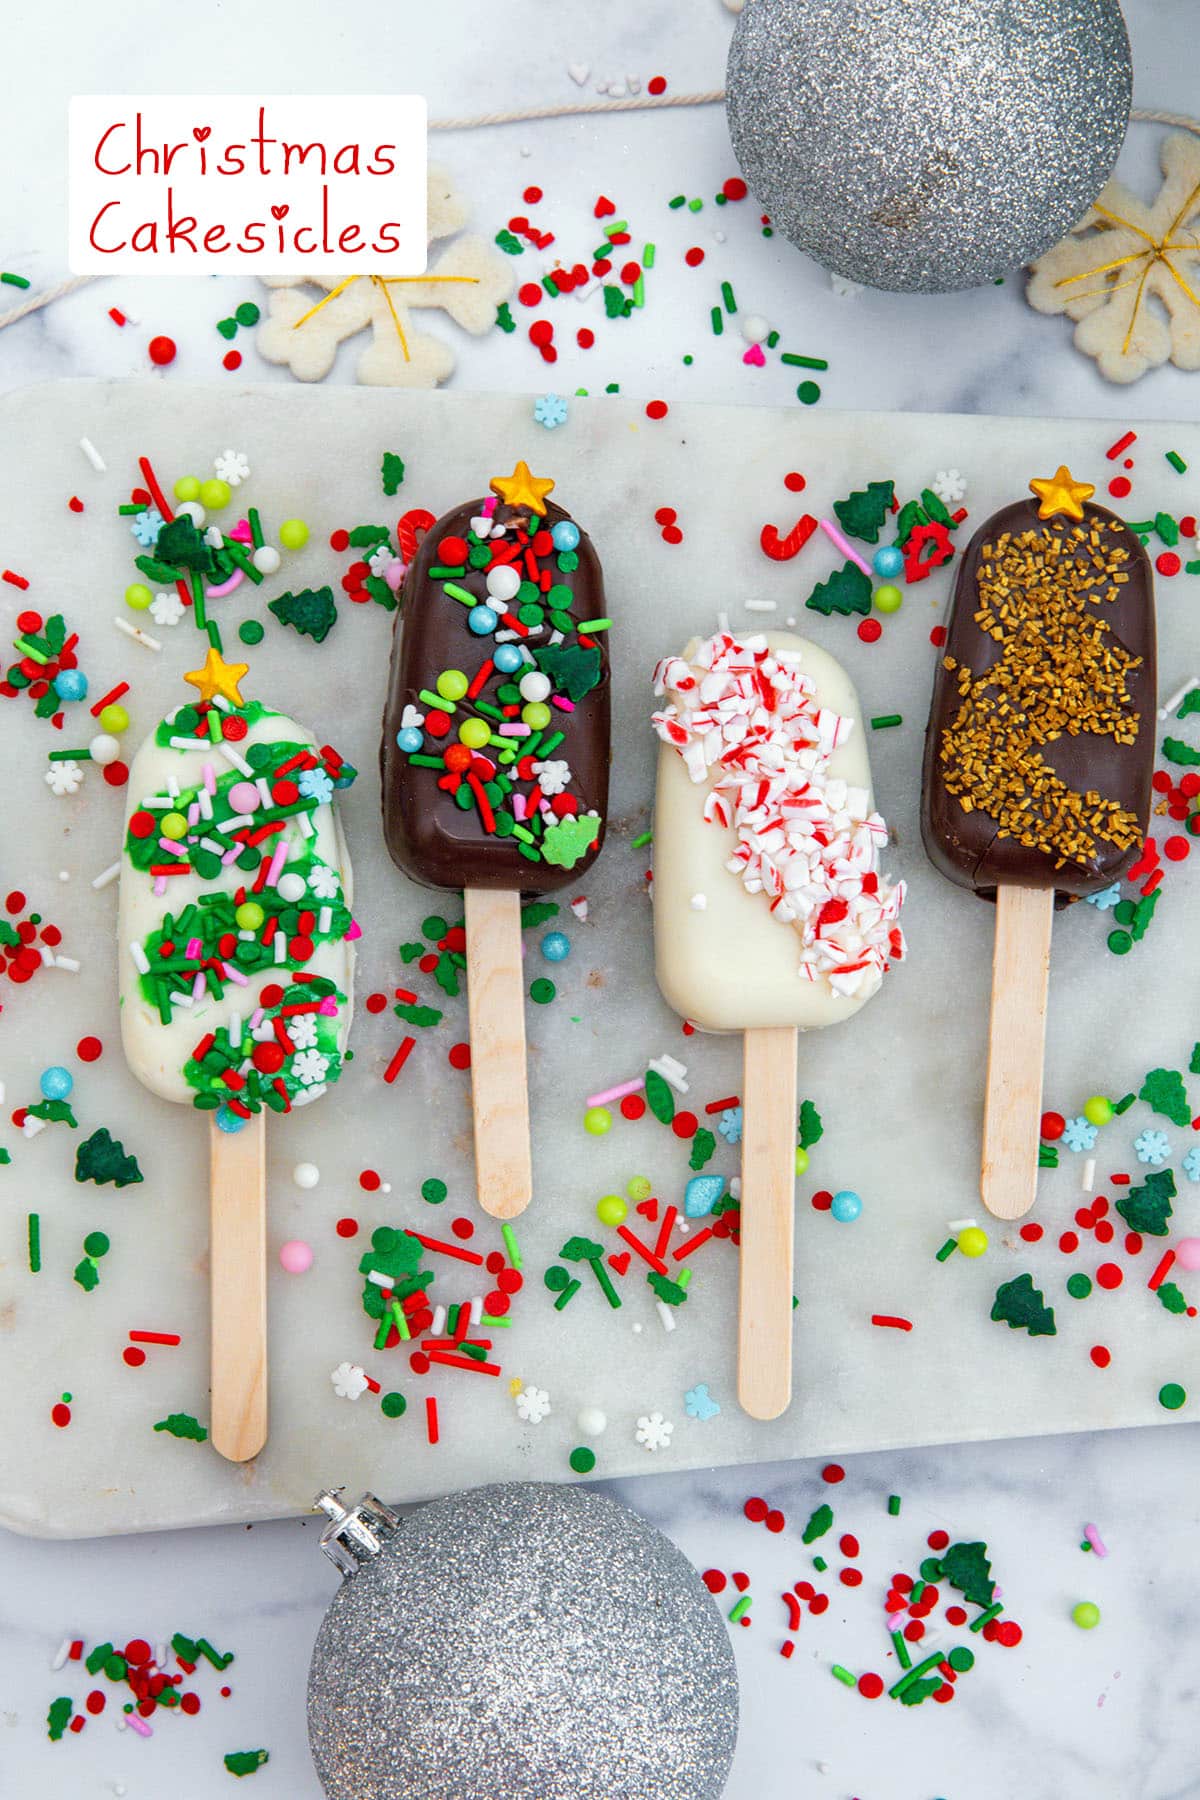
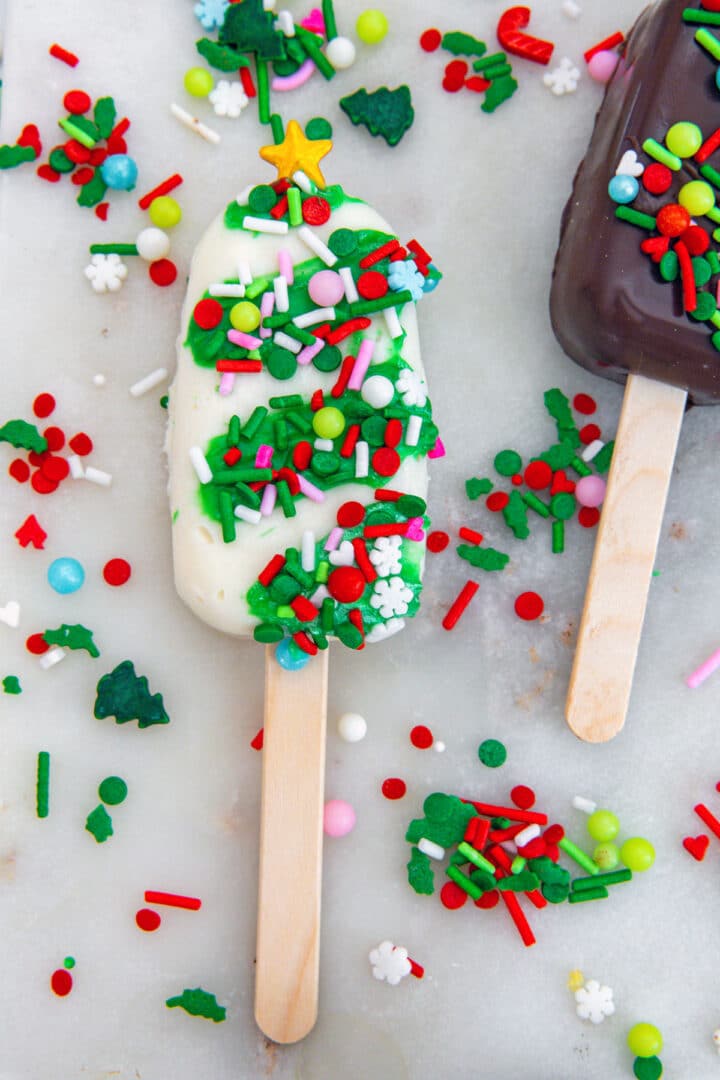
Looking for a super fun holiday treat that's more exciting than the typical Christmas cookie? These Christmas Cakesicles are easy to make and decorate and will become a showstopper at all your holiday parties!
Jump to:
Aren't you kind of bored of all the usual Christmas treats? I mean, Christmas cookies are fun, but I always find myself all cookie-d out by the end of the season.
Enter Christmas cakesicles. An awesome alternative to cookies, these little cake-filled, chocolate-covered treats are easy to make and fun to eat!
🍰 How are cakesicles different from cake pops?
As someone who has had many failed attempts at cake pops, I'm happy to tell you that cakesicles are SO much easier to make and decorate.
They're very similar to cake pops, but are made in a mold. They're a bit bigger and, of course, a different shape. They look kind of like popsicles, but they're actually cake coated in chocolate!
You don't have to be a baking pro to make them and they're also a super fun holiday project to get the kids involved in.
🗒 Ingredients and equipment
You do need a few things before you begin making your Christmas cakesicles, but everything is easy to obtain.
Here's what they require:
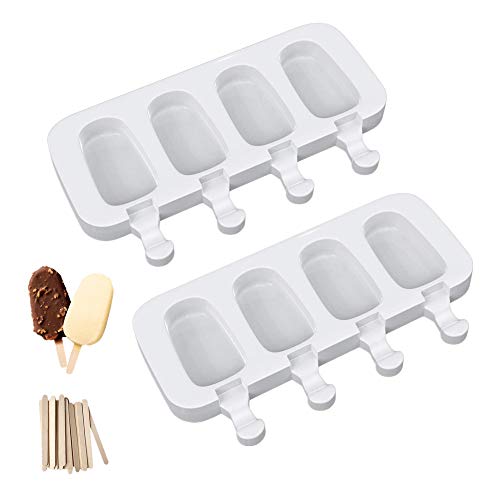
- Cakesicle molds: I linked the ones I use- they're technically "mini" size cakesicle molds, but in my opinion, they make the perfect size treats.
- Popsicle sticks: some molds come with them or you can purchase them separately.
- ½ of a 9x13" cake or 1 9" cake: you can use a boxed cake mix or make your own homemade cake (this is also a great way to use leftover cake!) in any flavor you want. I used vanilla cake and frosting here, but often make cakesicles with chocolate cake and frosting.
- 2 tablespoon frosting:again, you can make your own homemade frosting or use store-bought and you can use any flavor you want.
- Chocolate melting wafers, candy melts, or high-quality chocolate: you can either coat your cakesicles with white chocolate, milk chocolate, or dark chocolate. I used both milk chocolate melts and white chocolate melts for mine. You could even use red or green candy melts/melting wafers if you prefer. I don't recommend using chocolate chips as they're harder to melt.
- Decorating materials: you can decorate your cakesicles however you want, but I recommend getting some Christmas sprinkles, star sprinkles, and crushed candy canes. You may also want food coloring to color white chocolate for decorating.


🎄 How to make Christmas cakesicles
One of the best shortcuts for these cakesicles is using boxed cake and store-bought frosting, though, of course, you can use homemade if you prefer.
I usually make a 9x13 cake and use half of it for 16 cakesicles.
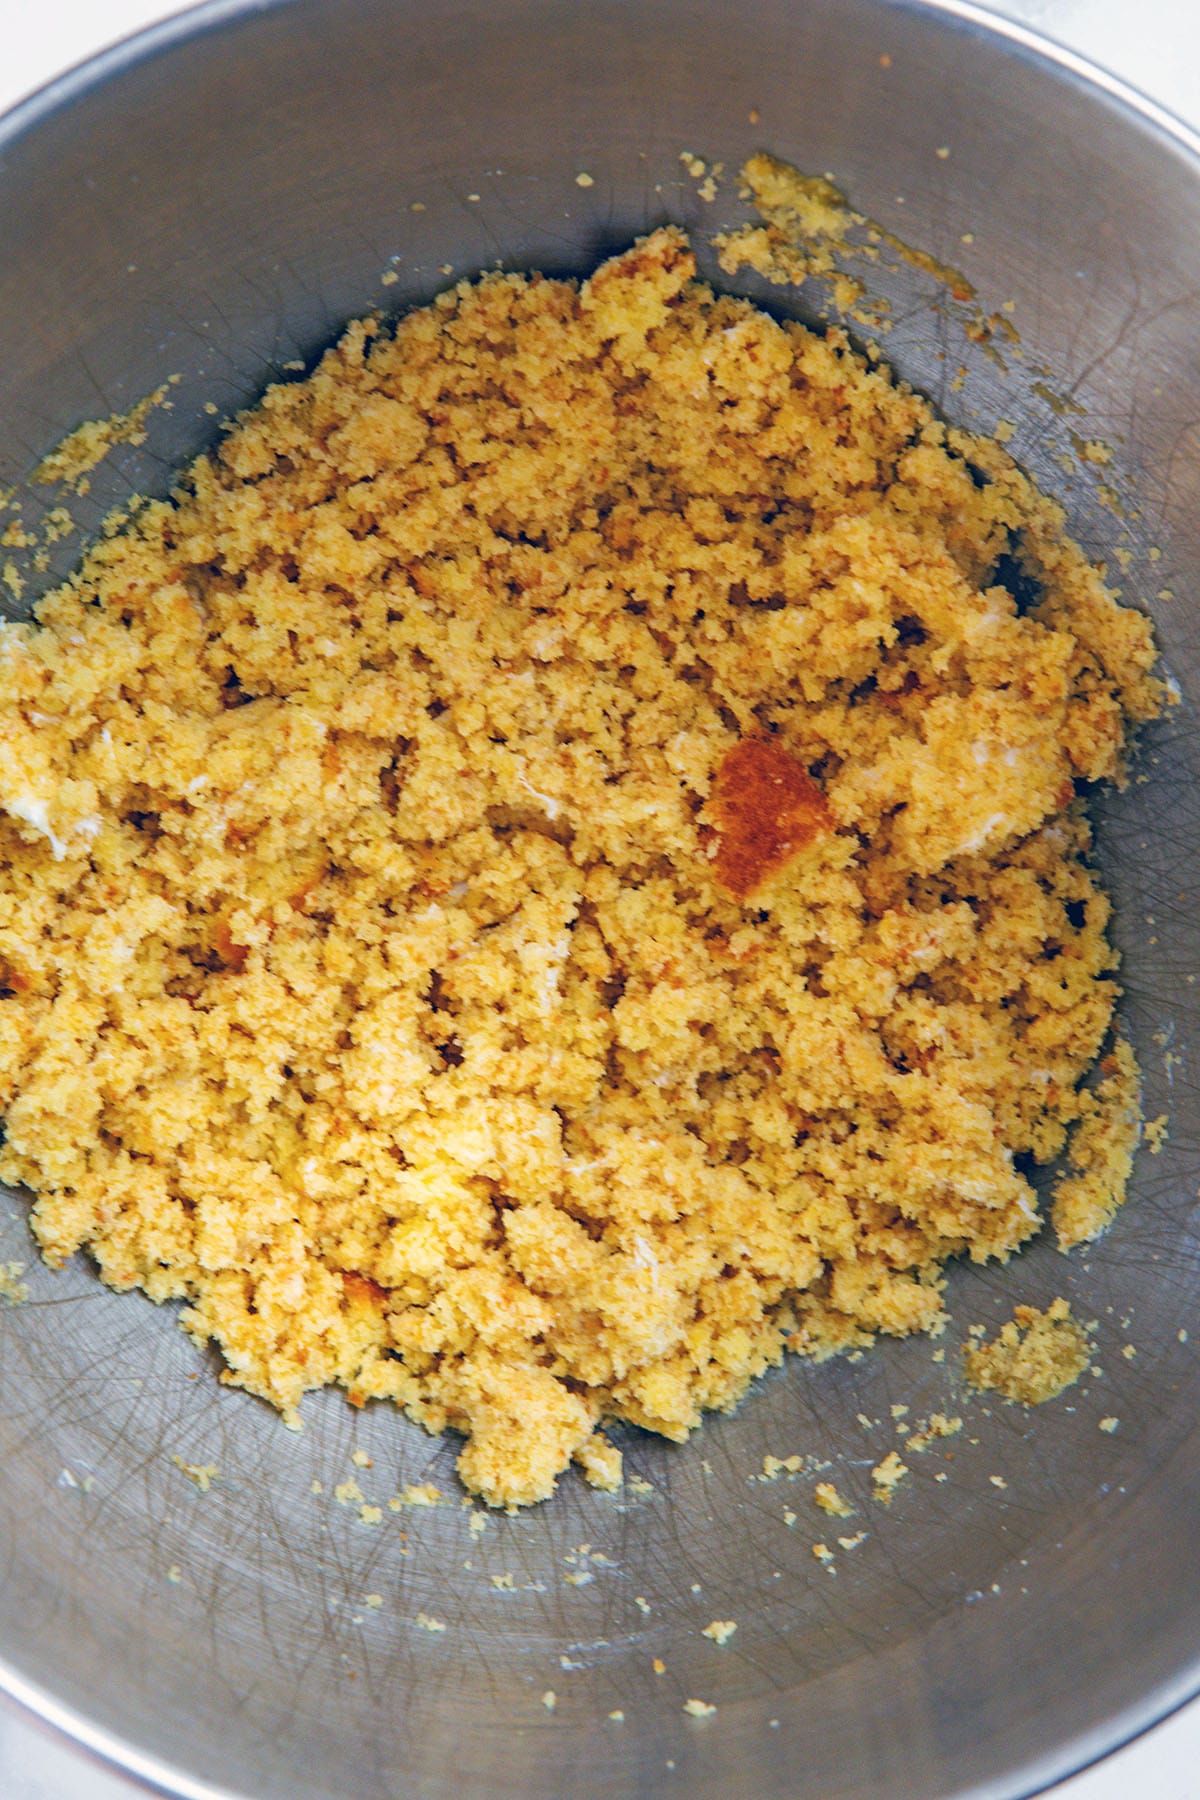
Once the cake has cooled, break it into pieces and place it in a bowl. Add about 3 tablespoon frosting.
And using your hands, mix everything together until it's cohesive. If you prefer, you can do this in the bowl of a stand mixer and use the paddle attachment to mix to combine.
Now, melt your chocolate or candy melts. As I mentioned, I used milk chocolate melting wafers and white chocolate melting wafers for these cakesicles, but I'll show you the process with the milk chocolate since it's easier to see in the molds.
You can either melt the chocolate in a double boiler in the microwave. If you use the microwave, I recommend using 50% power for 1 minute and then stirring before placing back in the microwave and using 50% heat for 30 seconds. Take out and stir. Continue this process until the chocolate is completely melted.
I like to work with about 1 cup of candy melts at a time and simply add more to the bowl and re-melt when needed. If chocolate hardens while you're working, simply put the bowl back in the microwave to re-melt or re-melt in the double boiler.
Now, spoon some of the chocolate into the bottom your cakesicle mold and using a small off-set spatula or a pastry brush, evenly distribute chocolate along the entire bottom of the mold and up the sides. You to completely cover the inside of the mold.
Take one of the popsicle sticks and insert it into the mold and then remove it. This is simply to ensure that the chocolate doesn't harden over the opening as you'll need to insert the stick later.
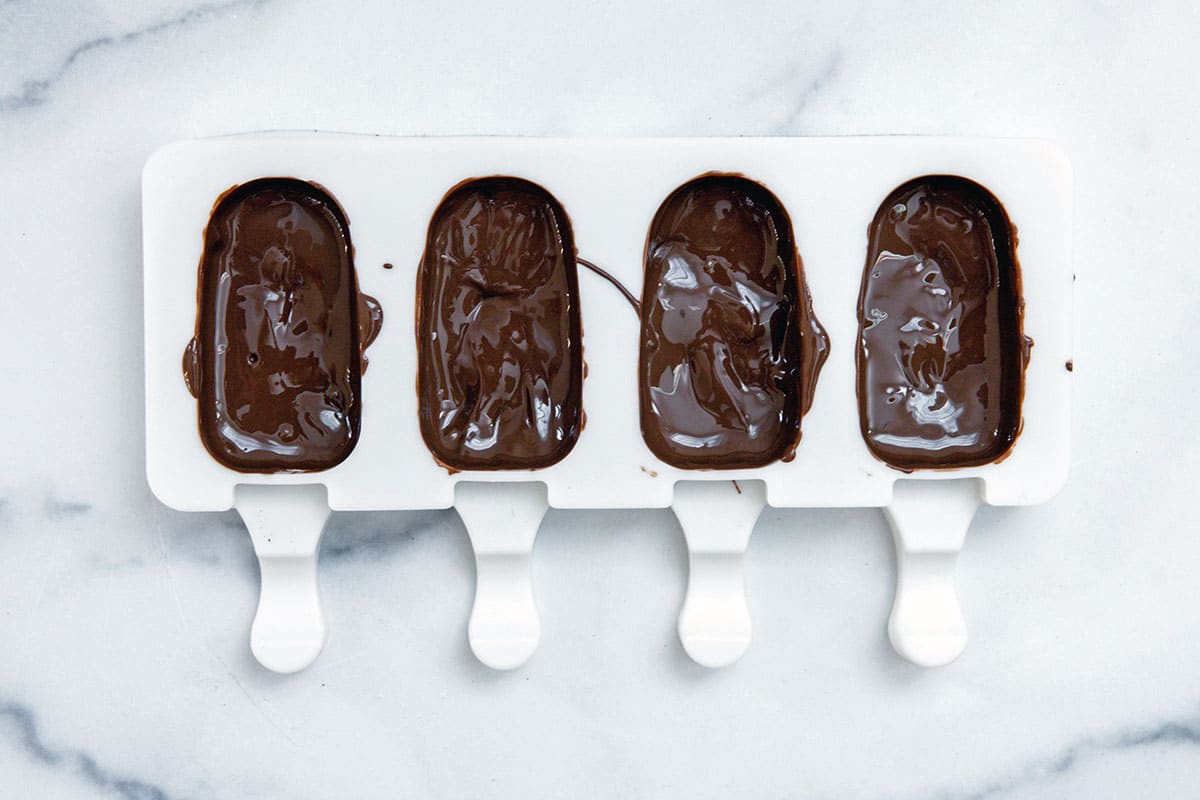
Place molds in the fridge for 5 minutes to harden. Upon removal, check sides of molds and if the chocolate looks too thin or there are spots missing, brush a little more on and let harden again.
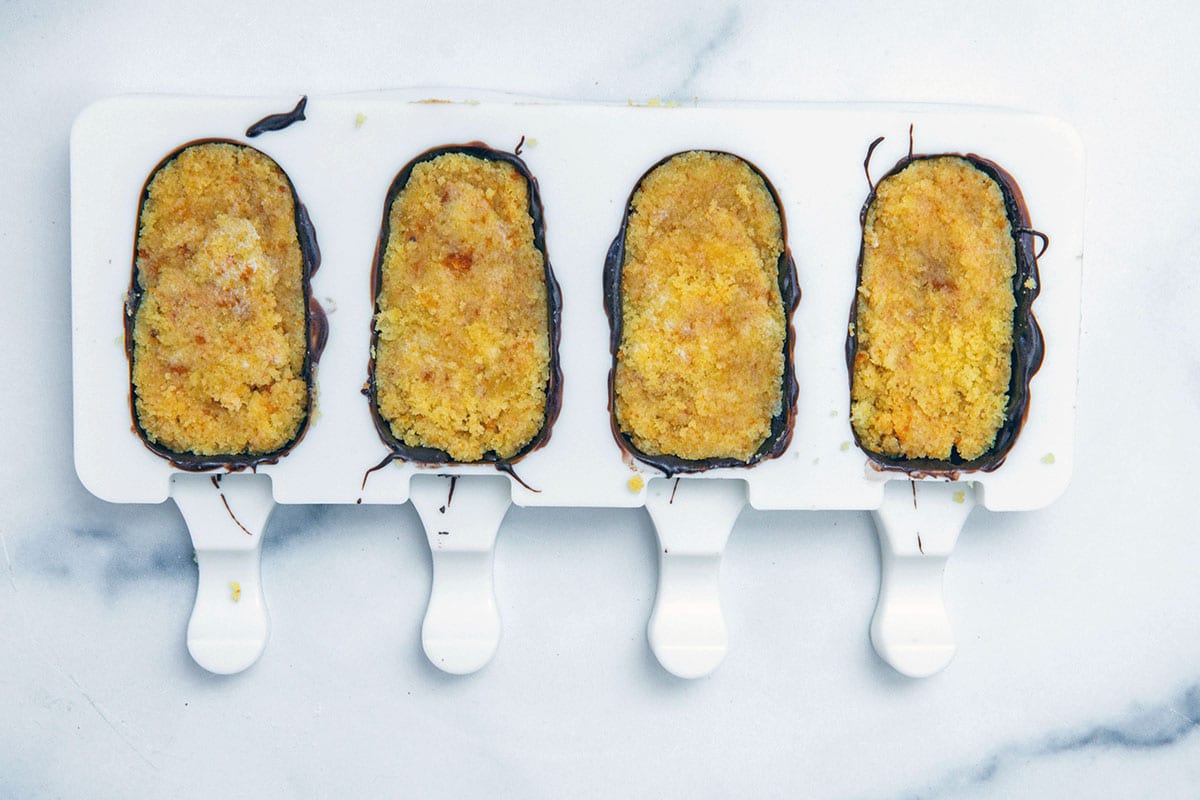
Put a little more than 1 tablespoon of cake mixture over the hardened chocolate in each mold and press down. Make sure it's nice and smooth with no crumbs and that it's just below the lip of the mold.
Insert a popsicle stick into each mold and press down on the cake again.
And then coat the cake with more melted chocolate to cover the backs of the cakesicles.
📧 Email Me This Recipe
Place in the fridge for 5 minutes to harden.
It's a lot of in and out of the fridge, but the chocolate should harden really quickly each time.
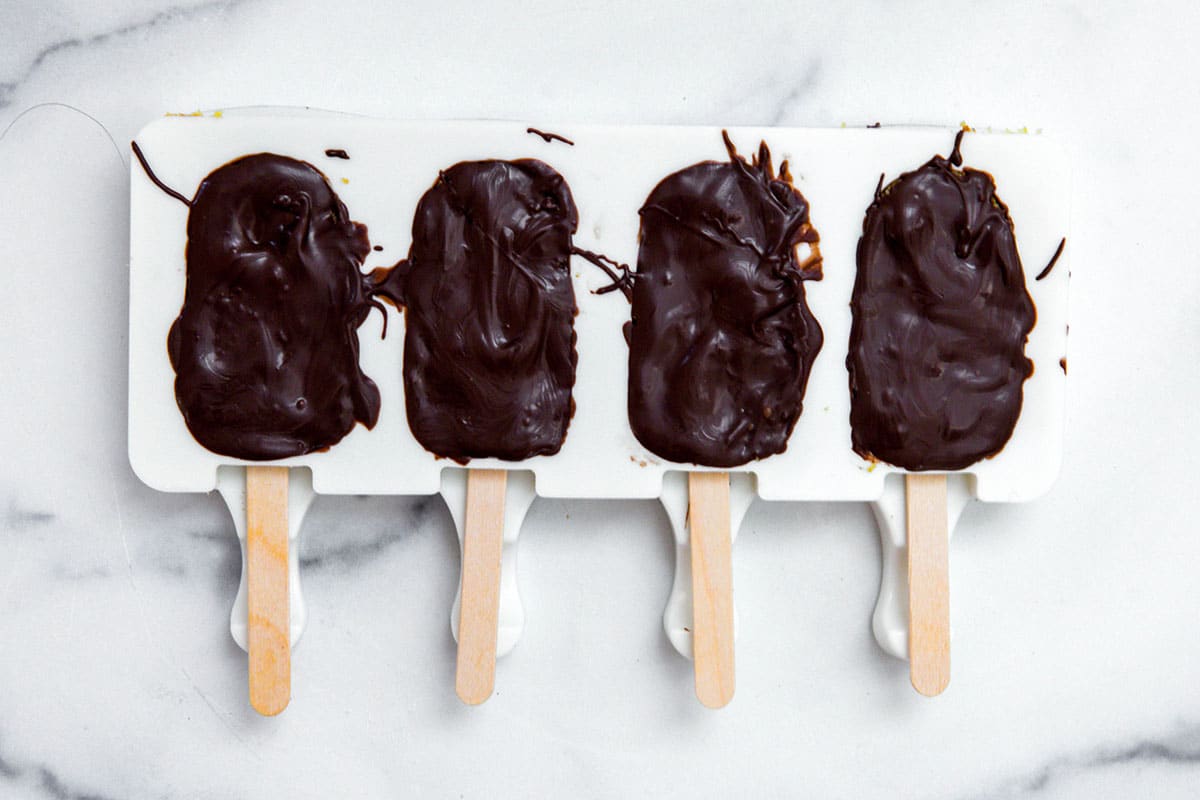
And you're ready to gently remove the cakesicles from their molds.
You'll have to wiggle them a little and take care when pushing the popsicle stick out. Repeat with molds.
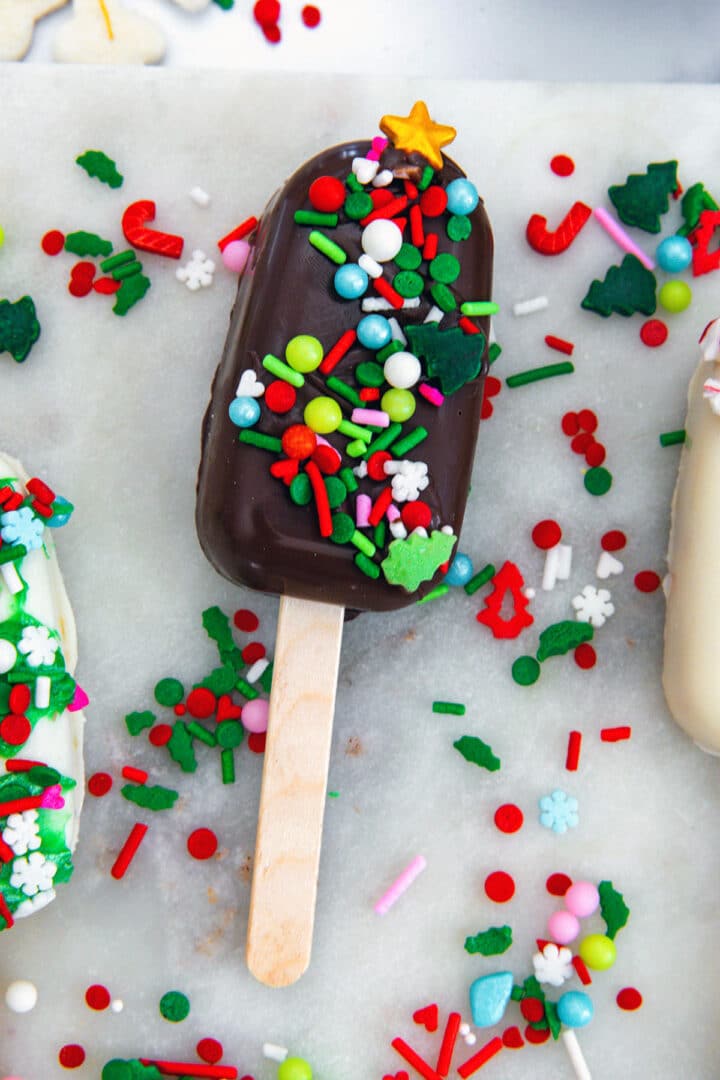
And get to decorating! To adhere the sprinkles, you'll need to brush a little more melted chocolate over the pops. You can brush it on as is or you can use food coloring to color it first (like I did with the first Christmas tree cakesicle).
You can really decorate your Christmas cakesicles however you want! Which also makes these a great baking project for kids.
Even if the cakesicles are super messy, they'll still be delicious!
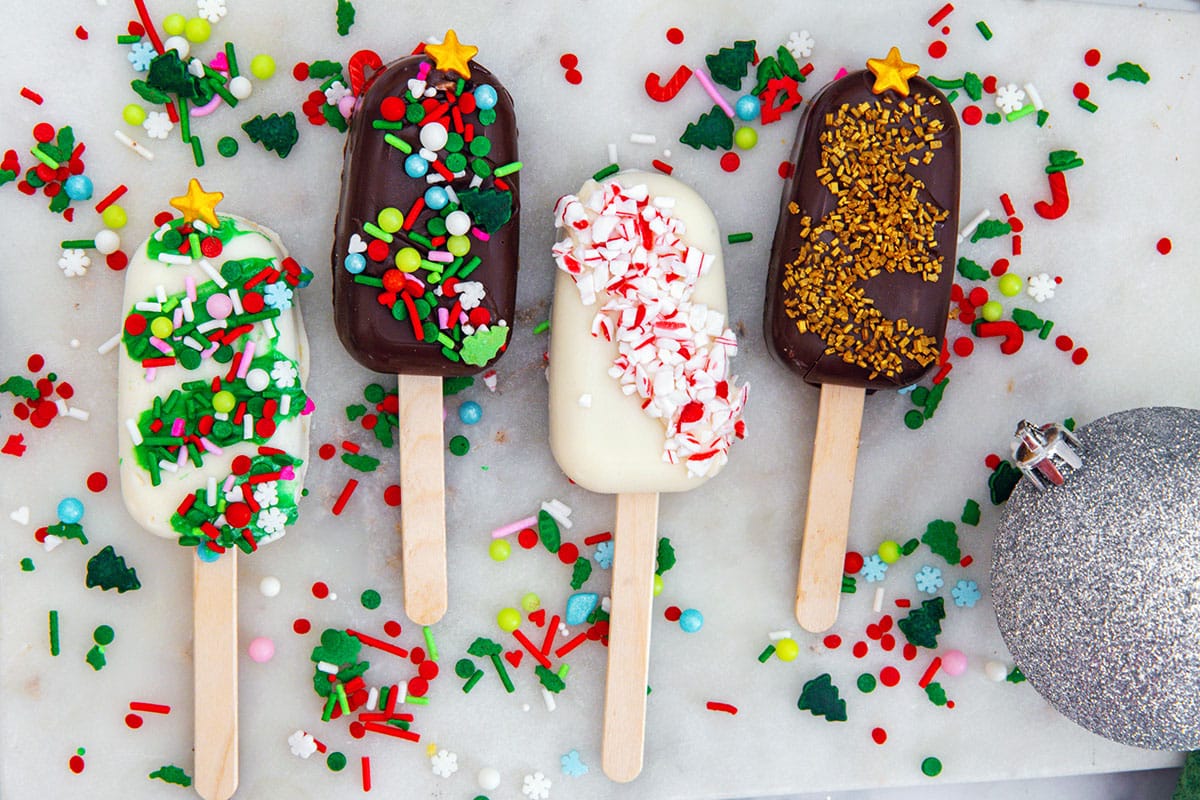
You can decorate them all differently or you can give them a more cohesive look.
Christmas cakesicles are a great addition to a holiday party dessert table, but I also love adding them to my Christmas cookie platters as they add a lot of extra fun!
A showstopper, if you will.
⏲️ How to store
I recommend storing your cakesicles at room temperature as condensation may form on them if you put them in the fridge. They're best stored with wax paper or parchment paper separating layers of cakesicles.
They should stay good for about a week at room temperature in an airtight container.

💡 Tips and tricks
Though these Christmas cakesicles are pretty easy to make, I do have some tips and tricks to share to make them a bit easier.
- If you notice your cakesicles are cracking, you may not be coating the molds thickly enough. You may want to consider brushing a second layer on after the first sets or brushing it on a little bit thicker. Pay close attention to the sides of the molds as you're brushing the coating on as you want to make sure it's nice and thick there.
- You may also want to use a second layer of chocolate if you're using white chocolate or white candy melts and chocolate cake as it's possible you'll be able to see the cake through just one layer.
- When you remove the cakesicles from the molds, make sure you're doing so very carefully. I recommend popping them out and then slowly jiggling the popsicle stick to slide it through the mold. If you push the popsicle stick, you'll likely push it out of the cakesicle.
- I recommend staying away from using chocolate chips for your chocolate and sticking to a specific melting chocolate or high-quality chocolate bar. Chocolate chips are prone to seizing and can get grainy when melted. I find them much. more difficult to use and they can add a lot of frustration to the project.
- More extra festive cakesicles, you can use Christmas cakesicle molds, which make cakesicles in shapes like Christmas trees, snowmen, and more.
🎅 More fun Christmas treats
I love a Christmas dessert that is a bit more fun and unique than the typical sugar cookie or peanut butter blossom.
Here are some of my favorite extra special Christmas treats:
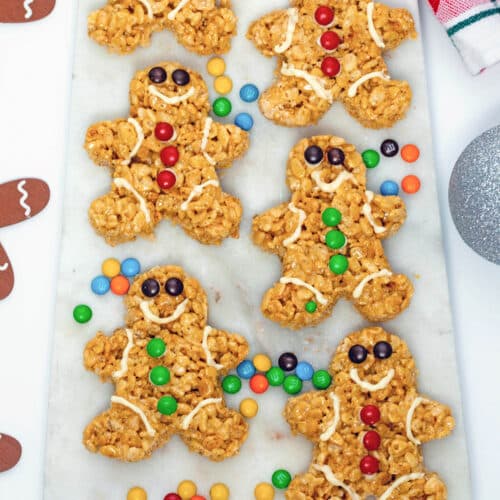
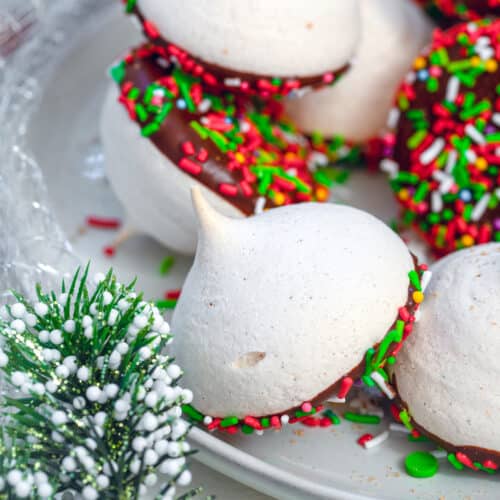
These Christmas Tree Rice Krispies treats are also pretty awesome.
They'll all add extra pizazz to holiday parties!
If you love the idea of cakesicles, I also have posts showing you how to decorate Easter cakesicles, Halloween cakesicles, and Valentine's Day Cakesicles.

To be honest, these Christmas cakesicles are likely to become sort of like your holiday dessert secret weapon.
They look impressive and fun, but nobody will know how easy they actually were to make!
📖 Recipe

Christmas Cakesicles
📧 Email Me This Recipe
Ingredients
- ½ 9x13" cake or 1 9" cake (from boxed mix or homemade in flavor of your choice)
- 3 tablespoon frosting (homemade or store-bought, flavor of your choice)
- 2 ¼ cups white chocolate, milk chocolate, or dark chocolate melting wafers (or high quality chocolate bars)
- Decorations of choice, like sprinkles, crushed candy canes, etc.
Instructions
- Once cake has cooled, break it into pieces and place in a bowl. Add frosting. Using your hands mix everything together until it's cohesive. If you prefer, you can do this in the bowl of a stand mixer and use the paddle attachment to mix to combine.
- Put melting wafers or chocolate in a bowl and melt in the microwave (I recommend using 50% heat for 1 minute and then stirring before placing back in the microwave and using 50% heat for 30 seconds. Take out and stir. Continue until chocolate is melted). If you prefer to use a double boiler, you can. I like to work with about 1 cup of candy melts at a time and simply add more to the bowl and re-melt when needed. If chocolate hardens while you're working, simply put the bowl back in the microwave to re-melt.
- Spoon some of the chocolate into the bottom your cakesicle mold and using a small off-set spatula or a pastry brush, evenly distribute chocolate along the entire bottom of the mold and up the sides. Take one of the popsicle sticks and insert it into the mold and then remove it. This is simply to ensure that the chocolate doesn't harden over the opening as you'll need to insert the stick later.
- Place molds in the fridge for 5 minutes to harden. Upon removal, check sides of molds and if the chocolate looks thin, brush a little more on and let harden again.
- Put a little more than 1 tablespoon of cake mixture over the hardened chocolate in each mold and press down. Make sure it's nice and smooth with no crumbs and that it's just below the lip of the mold. Insert a popsicle stick into each mold and press down on the cake again.
- Coat the cake with more melted chocolate to cover the backs of the cakesicles. Place in the fridge for 5 minutes to harden.
- Gently remove cakesicles from their molds. You'll have to wiggle them a little and take care when pushing the popsicle stick out. Repeat with molds.
- Brush a little more melted chocolate on the cakesicles (you can use food coloring to add color to white chocolate if you want) to adhere sprinkles, crushed candy canes. Decorate the cakesicles however you want!


Comments
No Comments