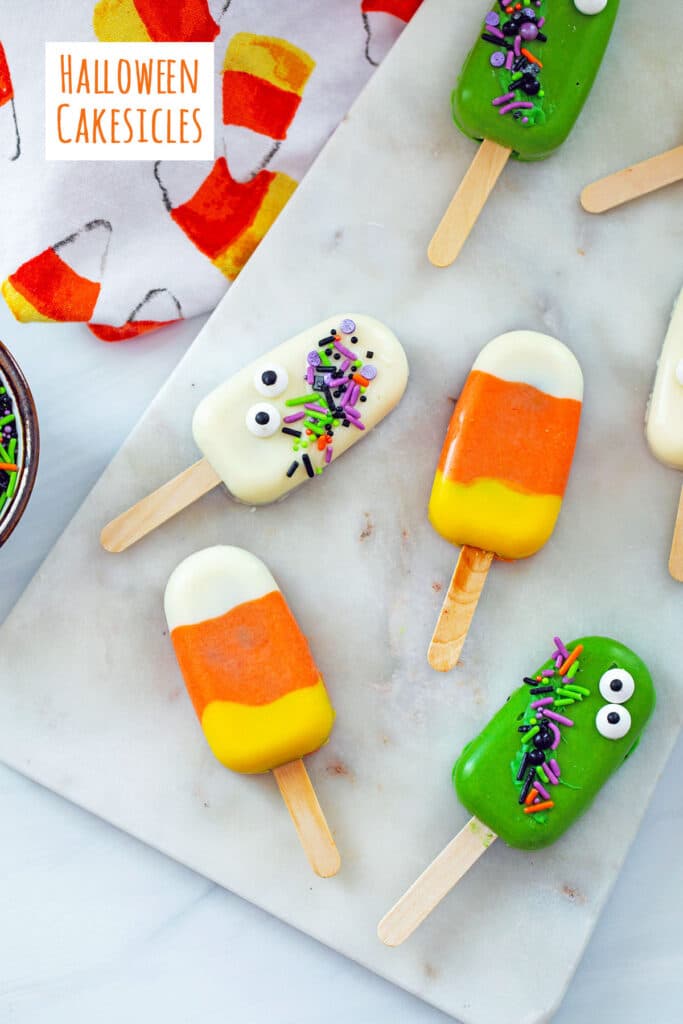
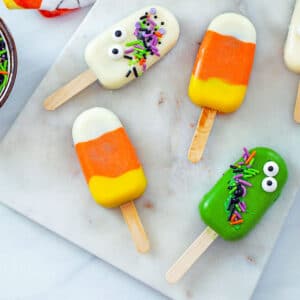
Looking for fun Halloween treats that are so easy anyone can make them? These Halloween Cakesicles are the cutest cake pop alternatives that can be customized in a ton of different ways and are a fun dessert to make with kids!
Jump to:
Are you ready for spooky season?? I'm super excited to share this Halloween cakesicle recipe with you today as it will add SO MUCH fun to your Halloween!
Not only are cakesicles incredibly easy to make (even for those of us who aren't great at decorating baked goods!), but they allow for as little or as much creativity as you'd like and are even a great Halloween baking activity to do with kids.
Whether you're making these treats to enjoy at home or to bring to a Halloween party, everyone is going to go wild over these delicious and adorable Halloween cakesicles!
❓ What is a cakesicle?
A cakesicle is like a cake pop, but in the shape of a popsicle.
They're made by coating a mold in melted chocolate and letting it harden, pressing in a cake/frosting mixture, adding a popsicle stick, and then covering the back in more melted chocolate.
Once the chocolate has set, you pop the cakesicle out of the mold and can decorate it any way you want.
❤️ Why you'll love this recipe
There are a lot of reasons to love these Halloween cakesicles, but my top reasons are that they're SO cute and SO easy.
I've made a lot of cake pops in my days and am pretty terrible at it. They never come out smooth, they're difficult to decorate, and half of them fall over before they're set. I've come to terms with the fact that I am just not and never will be a cake pop maker and decorator.
So, I was pretty excited when I discovered cakesicles and learned how much easier they are to make and decorate! Literally anyone can make cakesicles and there are a million different ways to customize them.
They're also a fun project to do with kids as they're so much easier to make than cake pops (just like these mummy halloween brownies). And they'd be so cute to add to a Halloween Snack Board.
Plus, they taste delicious!
🗒 Ingredients and equipment
There are a few things you need to make cakesicles, including:
- Cakesicle molds (there are tons on the market, but the ones I linked are the ones I use. They are "mini" size, but in my opinion, they make the perfect size cakesicles)
- Popsicle sticks (some molds come with them or you can purchase separately)
- ½ of a 9x13" cake or 1 9-inch cake (you can use a boxed cake mix or make your own homemade cake... This is also a great way to use leftover cake!)
- 2 Tbsp frosting (you can make your own homemade frosting or use store-bought)
- High-quality chocolate or candy melts (I highly recommend these for their awesome meltability)
- Food coloring, depending on what color you want your cakesicles (this is my all-time favorite food coloring)
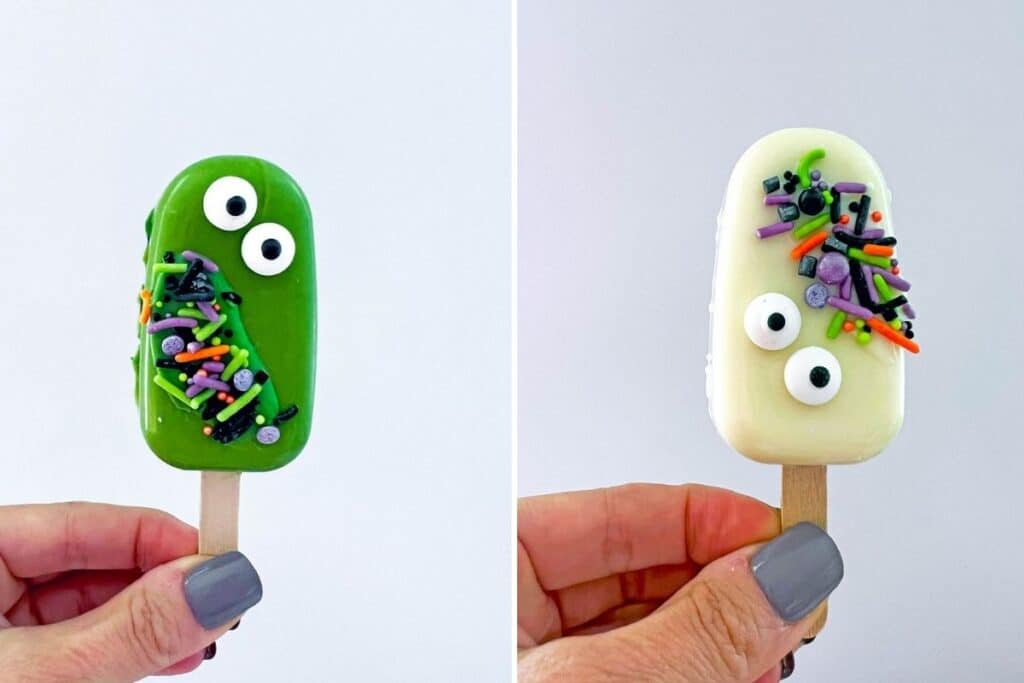
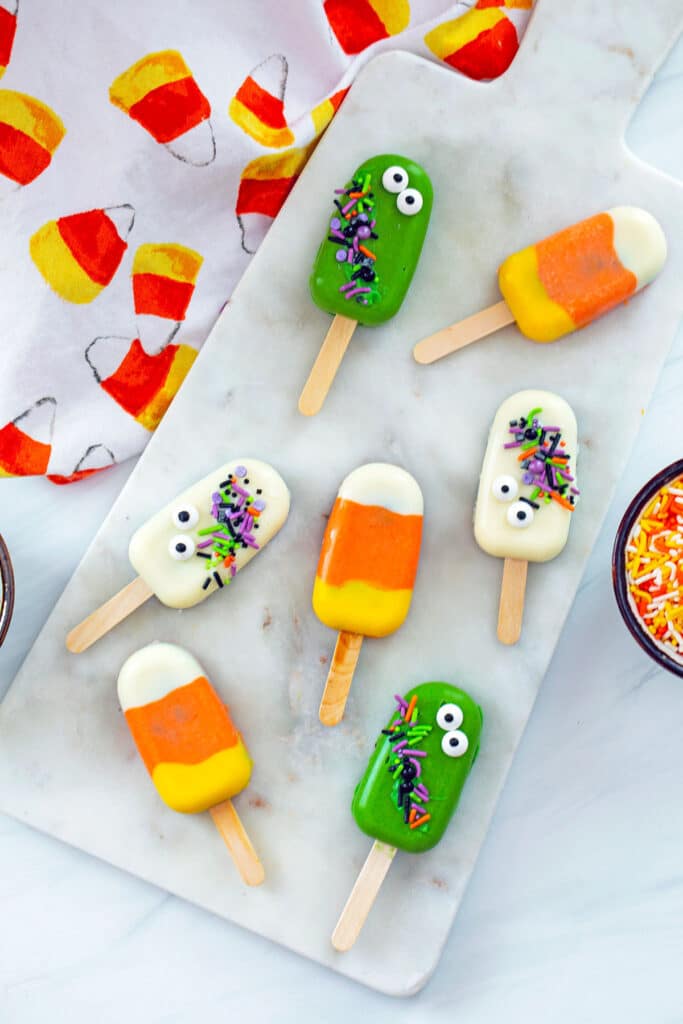
- Sprinkles and/or other decoration (for the white and green Halloween cakesicles I used these sprinkles and additional candy eyes)
Because cakesicles are so versatile, they can really be as simple or as complicated as you want. I'm mainly a from-scratch baker, but I love making cakesicles with boxed cake mix and store-bought frosting because it's so easy. But you can certainly make your own, too!
You can use any flavor of cake you want (for these ones, I used chocolate) and any flavor frosting (again, I used chocolate) and any kind of chocolate or candy melts for the coating (I use white and then color it).
In terms of the cakesicle coating, I recommend either using a high-quality chocolate or candy melts as chocolate chips don't tend to melt as well. I highly recommend these melts from ChocoMaker as they melt well and can be easily re-melted if they harden as you're working. They're also easy to color!
👩🍳 How to make Halloween cakesicles
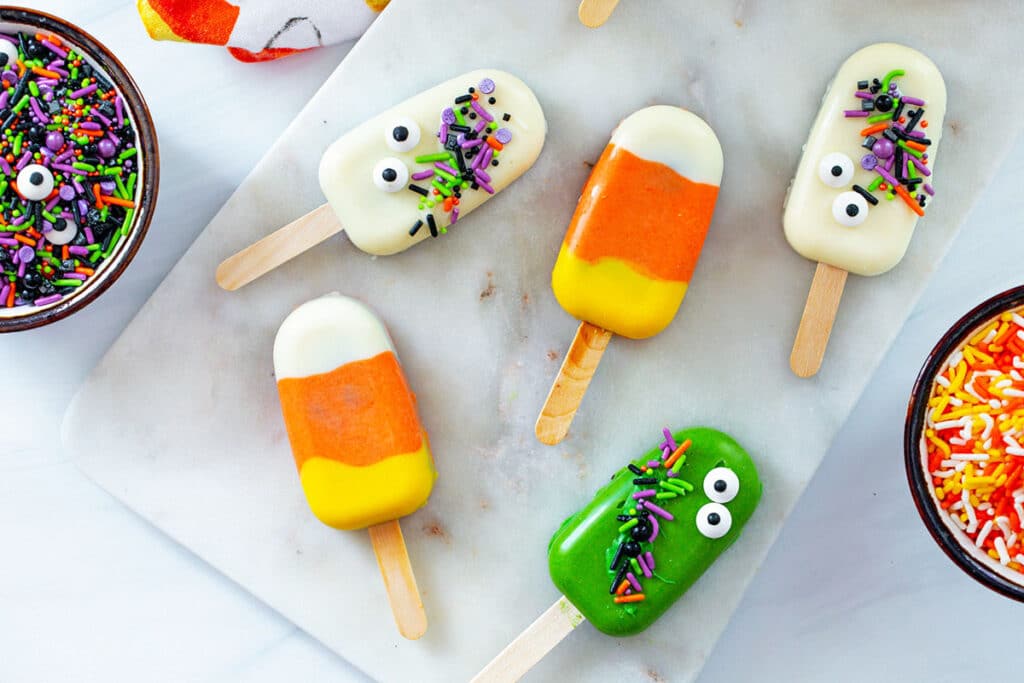
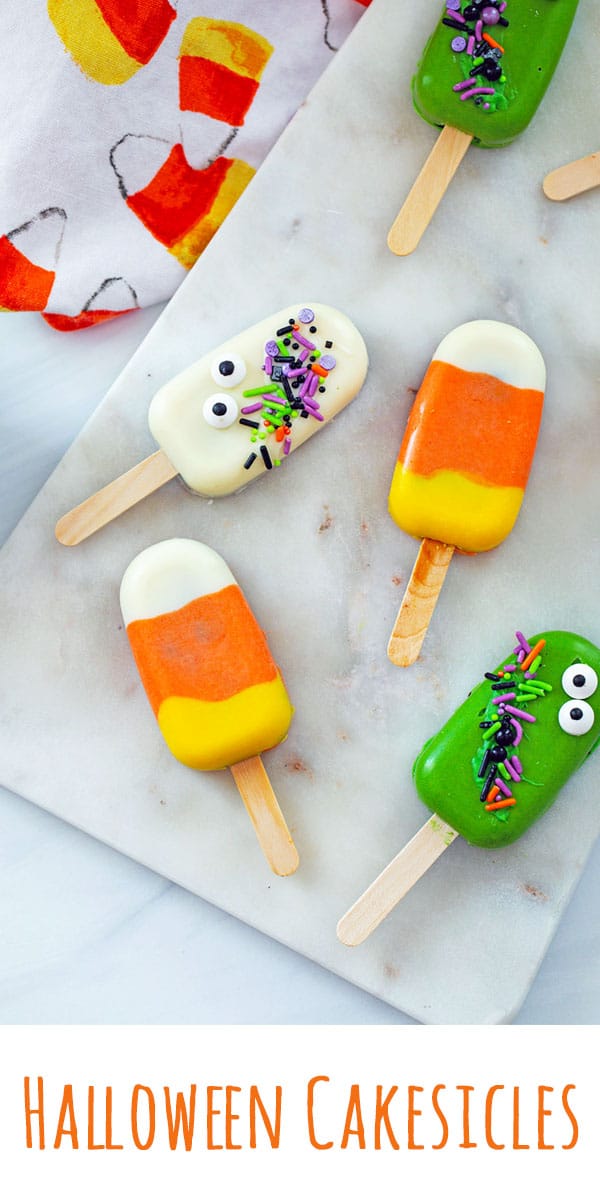
For this recipe, I'm going to detail how to make the candy corn cakesicles in my photos since once you can do those, you'll be able to make any Halloween cakesicles. Or cakesicles for any holiday at all!
To start these ones, divide white chocolate or candy melts into three separate bowls.
I recommend melting in the microwave at 50% power for one minute. Then remove and stir. Place back in microwave at 50% power for 30 seconds. Remove and stir again. Continue heating at 50% power for 30 seconds and stirring until chocolate is completely melted.
If you prefer to use a double boiler to melt your chocolate or candy melts (or a candy melt pot), you definitely can.
I melted all of my bowls at once and then just re-heated as necessary (if they started to harden). However, I recommend working with one bowl at a time and melting the other while your cakesicles are in the fridge hardening.
You'll want to add 3-4 drops orange food coloring to one bowl and 3-4 drops yellow food coloring to another bowl. Leave the third bowl white.
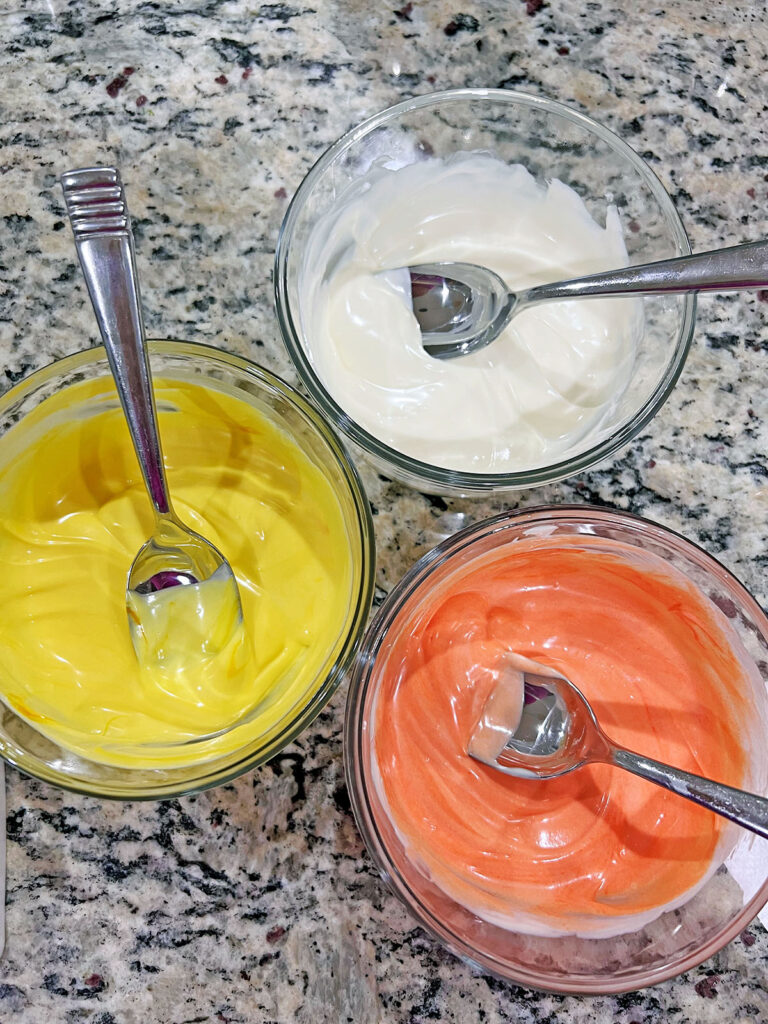
Now you're ready to start coating your mini cakesicle molds. If you're using larger molds, you'll need to increase the amount of chocolate and cake used.
Starting with the yellow, put a little of the candy melts into the bottom of your cakesicle mold and evenly distribute up the sids and along the bottom.
Some people use a paintbrush to coat the molds, but I find using a small off-set spatula is easiest.
It's often recommended that you brush on another layer of chocolate to create a thicker "shell" after the first one hardens, but I find that can result in too thick of a candy shell to my liking. It was also going to add a lot of work since I'd have to repeat with all three colors. So, I tried to paint on a thicker initial layer and then added some more to the sides if they were looking a little thin.
Now, be sure to take one of your popsicle sticks and insert it in the mold right after you coat it with chocolate. And then remove it. This is simply to ensure that the chocolate doesn't harden over the opening as you'll need to insert the stick later.
Pop the mold in the fridge for about 5 minutes to set the chocolate.
Remove from fridge and evenly distribute the orange chocolate to the middle of the mold, along the bottom and up the sides. Again, pop in the fridge for 5 minutes.
Generally with candy corn, the orange section is the largest, so I tried to demonstrate that in the cakesicles.
Now, finish by coating the top of the mold with the white, again, being sure to go up the sides. Let harden in the fridge for 5 minutes.
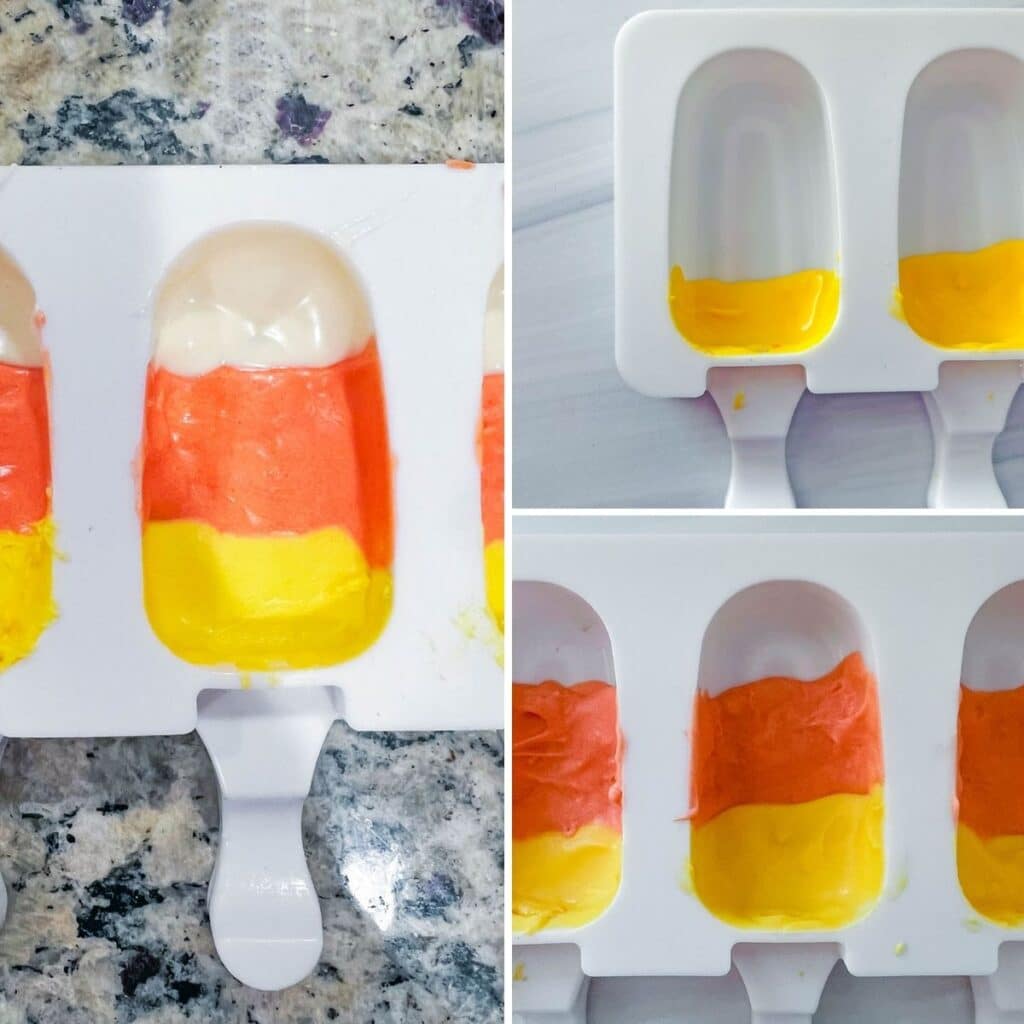
Once the chocolate is in the molds and hardened, you can add another layer of each color over the first if you want (chilling in between). Or you can just see if any of the sides look thin and add more there. This will help prevent cracking when you remove your cakesicles from the molds.
Now, break up your half 9x13 cake and put it in a large bowl with 2 Tbsp of frosting. You can use any flavor of cake you want and any flavor of frosting. I decided to do double chocolate!
Using your hands mix everything together until it's cohesive.
You can also use a stand mixer to combine the cake and frosting.
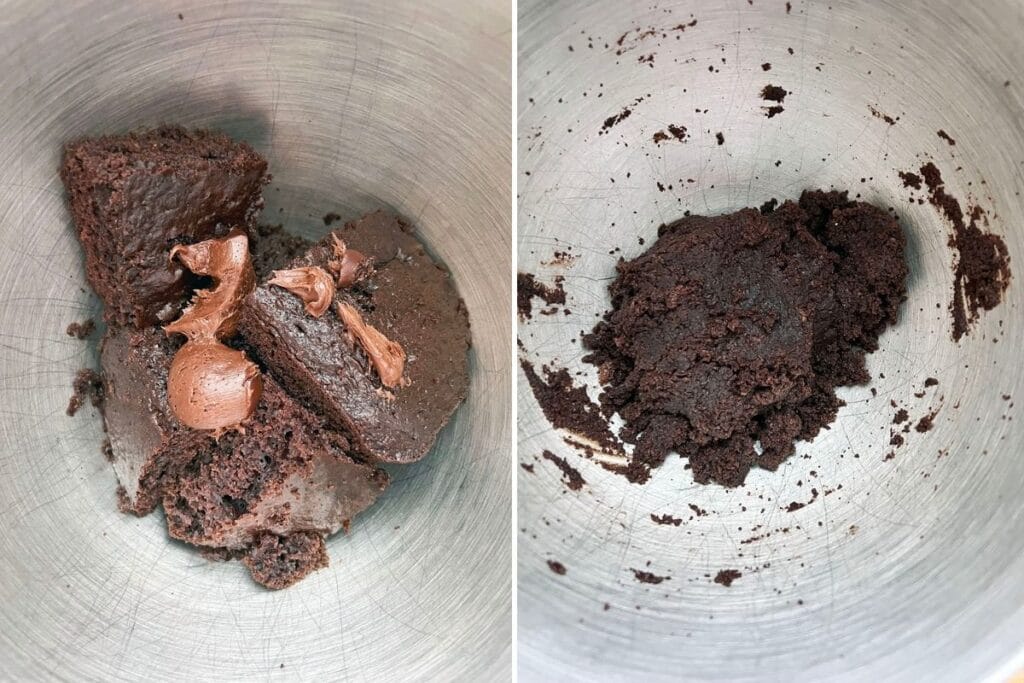
Put a little more than 1 Tbsp of cake mixture over the hardened chocolate in each mold and press down.
Make sure it's nice and smooth with no crumbs and that it's just below the lip of the mold.
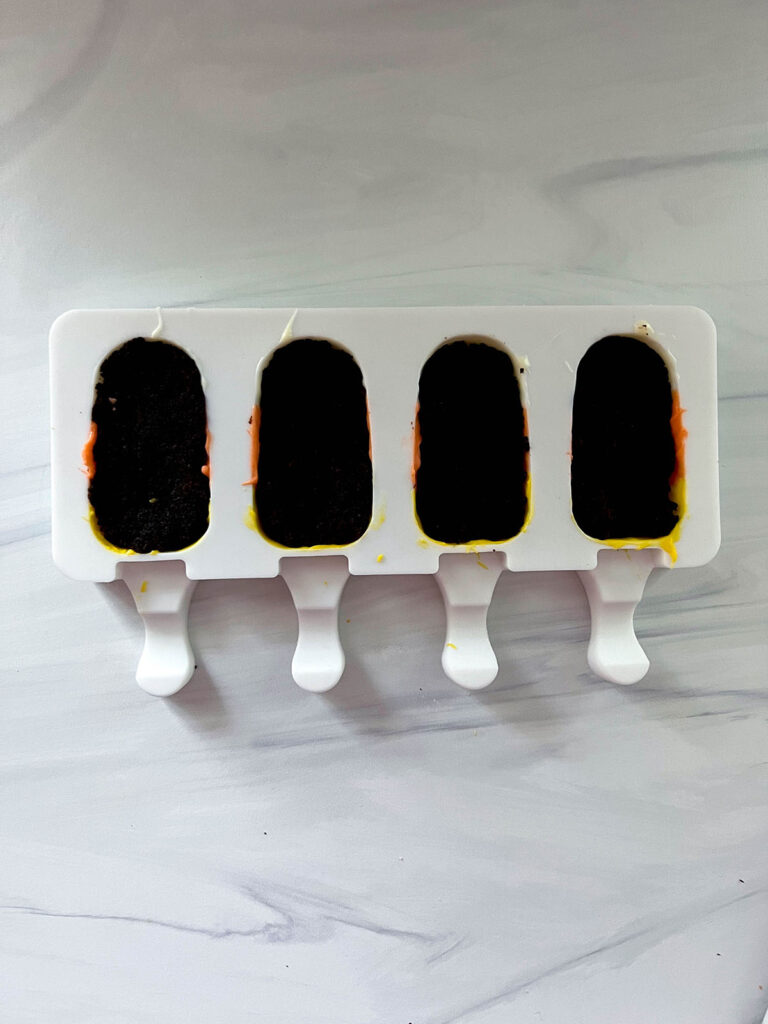
Insert a popsicle stick into each mold and press down on the cake again. Now, coat the cake with more melted white chocolate.
Instead of doing a candy corn design again, I simply coated the backs of the Halloween cakesicles with one color chocolate.
Pop in the fridge for 5 minutes to harden.
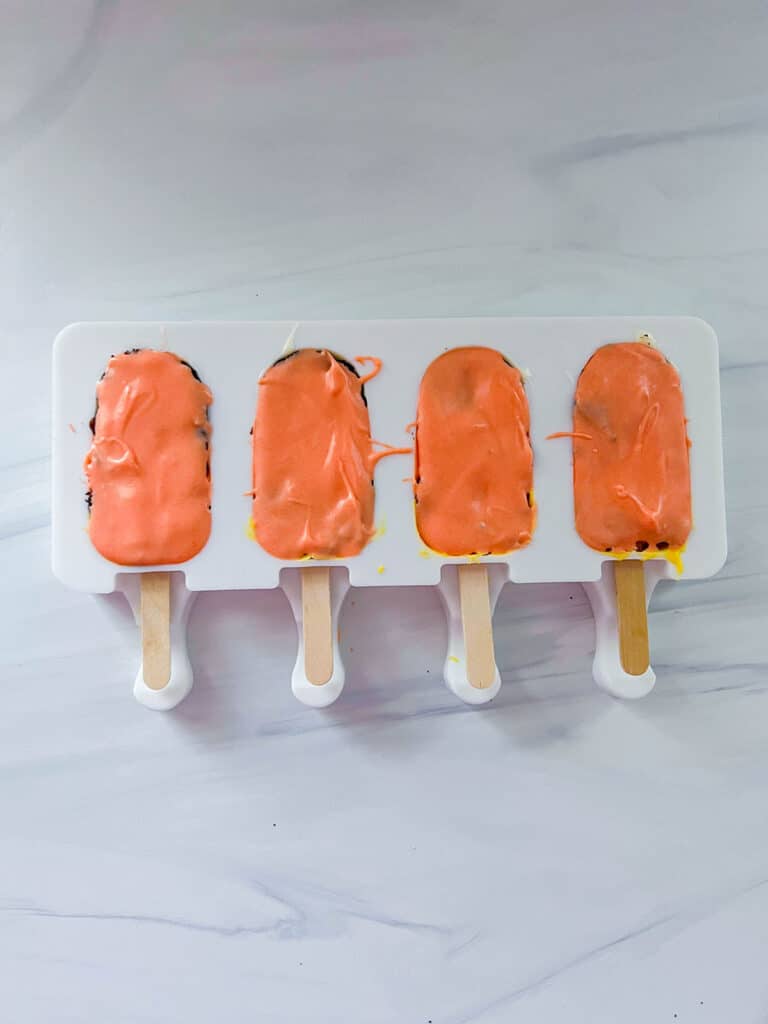
Now, gently remove cakesicles from their molds. You'll have to wiggle them a little and take care when pushing the popsicle stick out.
And your candy corn cakesicles are complete! You probably thought my melted candy melts looked a bit messy in their molds... I sure did.
But look how smooth the cakesicles come out when they're removed from the molds. This is why I love cakesicles so much more than cake pops!
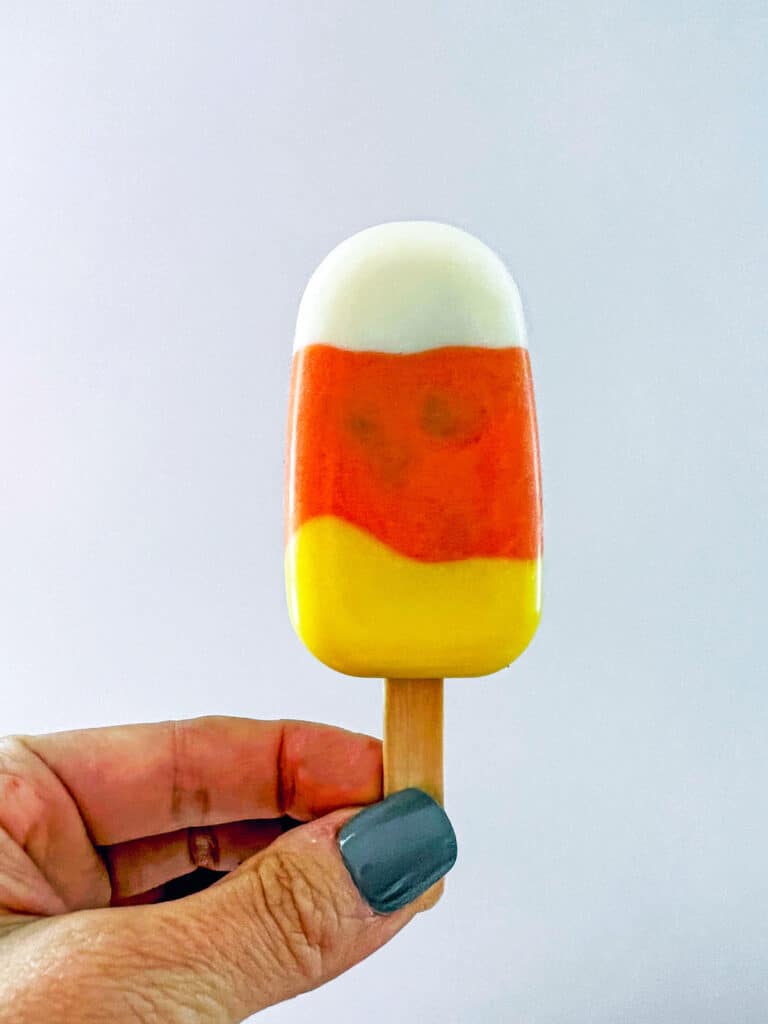
Take a bite and you get a delicious mouthful of candy coating AND super moist and yummy cake.
Is there anything better??
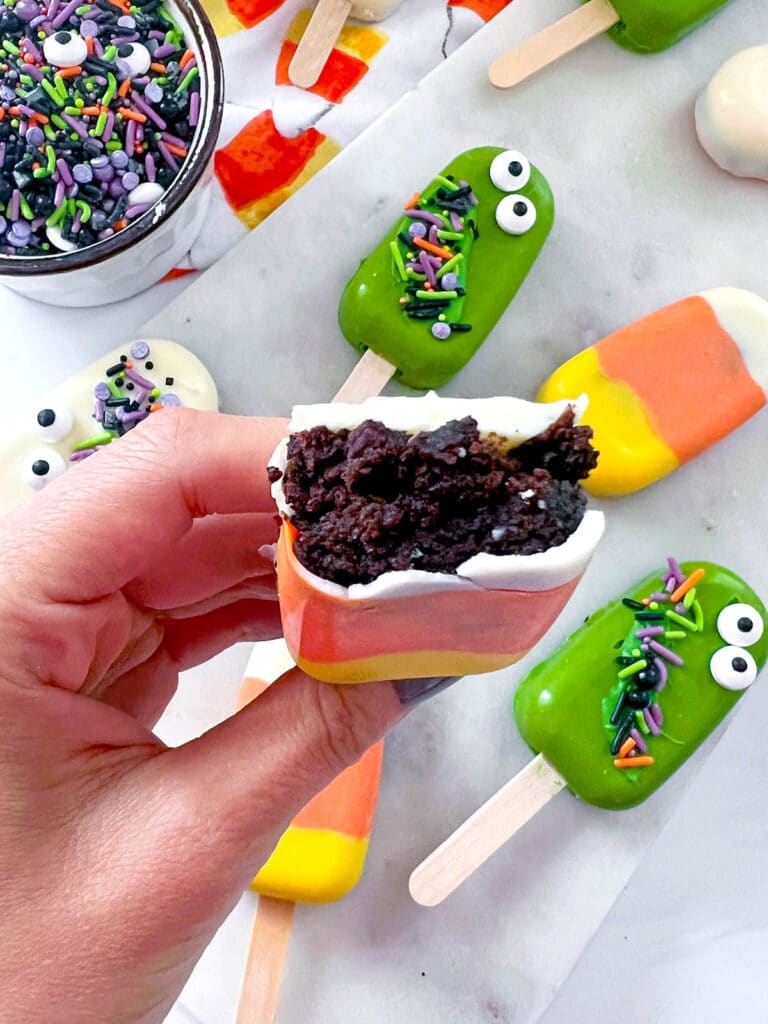
Of course, if you want to make single color cakesicles, the process is even easier!
You can melt all your candy melts/white chocolate at once and spread it in the molds all at once instead of in 3 separate batches.
Always make sure you have a little leftover melted chocolate (in the same color as your cakesicle) to spread on the cakesicle to add on sprinkles or candy eyes.
⏲️ How to store
I recommend that you store your cakesicles in an airtight container at room temperature for up to a week.
Storing them in the fridge will extend the life of them, but it's likely that condensation will form on the cakesicles and they won't look their best.
When storing in an airtight container, separate layers of cakesicles with wax paper or parchment paper.
👻 Troubleshooting
- My chocolate coating is cracking when I remove it from the mold: This could be because the chocolate coating wasn't thick enough in your molds. You may want to consider a second layer after the first sets or brushing it on a little bit thicker. Pay close attention to the sides of the molds as you're brushing the coating on as you want to make sure it's nice and thick there.
- My chocolate hardens before I can finish coating the molds/backs of cakesicles: You can certainly pop the chocolate back in the microwave or double boiler to re-melt it. I generally do this a couple times when making cakesicles and is, in part, why I recommend these candy melts as they're so easy to work with.
- My popsicle sticks are falling out of the cakesicles: Make sure you're very carefully removing the cakesicles from the molds. I recommend popping them out and then slowly jiggling the popsicle stick to slide it through the mold (if you push it, you'll likely push it out of the cakesicle)
- I can see the chocolate cake through my candy coating: I had this issue a little bit with my candy corn cakesicles since I only used one layer of white chocolate on them. If you want to avoid this, once the chocolate layer sets in your molds, brush on another layer.
🥣 Can I dip cakesicles instead of coating mold?
Yes, you can! If you want to dip cakesicles, you can simple press the cake and frosting mixture into the molds and freezing them for 30 minutes. Then remove the cakesicles from the molds and dip them into melted chocolate or candy melts. Stand to let chocolate set.
But one of the main reasons I like cakesicles so much more than cake pops is that they come out looking so much neater and smoother (for me). I don't like dipping cake pops and I love that I don't have to dip cakesicles.
🍰 What do I do with the rest of my cake?
If you're using a boxed cake mix, you only need half of it for this cakesicle recipe. You can either make a 9x13 cake and use half of it or make 2 8- or 9-inch round cakes and use one. So, what do you do with the leftover cake?
Of course, you could simple frost it and eat it! Or you could double the rest of this recipe and make make 32 cakesicles instead of 16.
Or you can freeze the cake to make more cakesicles with later! Just wrap the cooled cake or cake half in a layer of plastic wrap followed by a layer of aluminum foil and it should keep in your freezer for up to 2 months.
Just be sure to thaw fully before using.
🎃 More Halloween recipes
I hope I've convinced you to try your hand at cakesicles this Halloween season. But if you're looking for more fun Halloween treats, I've got you covered! Here are some of my favorites!
- Halloween Party Popcorn
- Halloween Trail Mix
- Candy Corn Simple Syrup
- Candy Corn Toffee
- Candy Corn Ice Cream
- Halloween Swirled Cheesecake Bars (from Inside Bru Crew Life)
- Halloween Rocky Road Slices (The Flavor Bender)
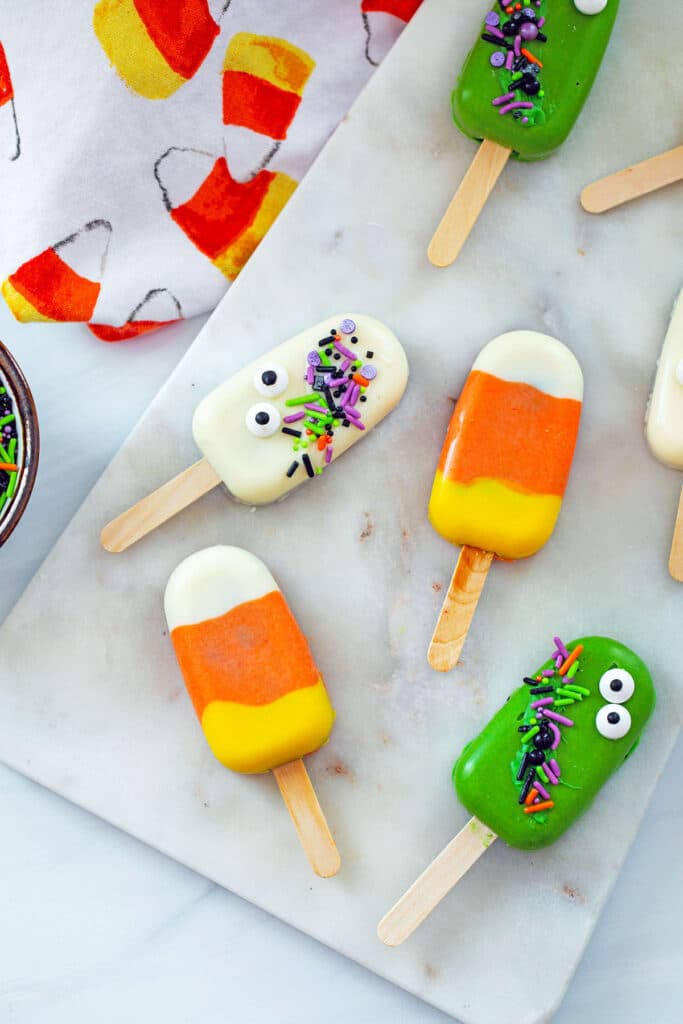
And now I'm off to plan the cakesicles I'll be making for every other holiday of the year! And to rejoice in the fact that I'll never struggle over making cake pops again.
Finally, a totally adorable baking treat that doesn't require a ton of decorating talent. It's almost like cakesicles were made for me.
Have you ever made cakesicles before? Do you like making cake pops?
📖 Recipe
Halloween Cakesicles
Ingredients
- ½ 9x13 cake or 1 9-inch cake (homemade or from a boxed mix, flavor of choice)
- 2 Tbsp buttercream frosting (homemade or store-bought, flavor of choice)
- 2 ¼ cups Candy melts or high-quality white chocolate
- Orange and yellow food coloring
Instructions
- Once cake has cooled, break it into pieces and place in a bowl. Add frosting. Using your hands mix everything together until it's cohesive. If you prefer, you can do this in the bowl of a stand mixer and use the paddle attachment to mix to combine.
- Divide white chocolate or candy melts into 3 separate bowls, putting ¾ cup in each bowl. Place one bowl in the microwave and melt (I recommend using 50% heat for 1 minute and then stirring before placing back in the microwave and using 50% heat for 30 seconds. Take out and stir. Continue until chocolate is melted). If you prefer to use a double boiler, you can. Add 3-4 drops of yellow food coloring to melted chocolate and stir to combine.
- Spoon a little of the yellow chocolate into the bottom your cakesicle mold and using a small off-set spatula or a pastry brush, evenly distribute chocolate along the bottom of the mold and up the sides. Place in the fridge for 5 minutes to harden. Upon removal, check sides of molds and if the chocolate looks thin, brush a little more on and let harden again.
- Take one of the popsicle sticks and insert it into the mold and then remove it. This is simply to ensure that the chocolate doesn't harden over the opening as you'll need to insert the stick later.
- While cakesicles are in fridge repeat melting process with second bowl. Add 3-4 drops of orange food coloring. Evenly distribute the orange chocolate to the middle of the mold, along the bottom and up the sides. Again, pop in the fridge for 5 minutes. Check sides and add more chocolate to thicken if necessary.
- Repeat melting process with third bowl and keep mixture white. Finish by coating the top of the mold with the white, again, being sure to go up the sides. Let harden in the fridge for 5 minutes. Check sides and add more chocolate to thicken if necessary.
- Put a little more than 1 Tbsp of cake mixture over the hardened chocolate in each mold and press down. Make sure it's nice and smooth with no crumbs and that it's just below the lip of the mold. Insert a popsicle stick into each mold and press down on the cake again.
- Coat the cake with more melted white chocolate (color of your choice or you can repeat the yellow, orange, and white pattern) to cover the backs of the cakesicles. Place in the fridge for 5 minutes to harden.
- Gently remove cakesicles from their molds. You'll have to wiggle them a little and take care when pushing the popsicle stick out.
- If you want to decorate the cakesicles (I didn't with the candy corn ones, but did with the other Halloween ones), simply brush a little more melted chocolate on to adhere sprinkles, candy eyes, etc.
Notes
- The white and green Halloween cakesicles you see in these photos are even easier! Simply melt the candy melts or white chocolate all at once and add food coloring if you want. Evenly distribute on the bottom and sides of the entire cakesicle mold. Insert and remove popsicle stick. Chill for 5 minutes. Add a second layer or brush more chocolate on sides to thicken if necessary. Press down cake and frosting mixture and insert popsicle stick. Coat backs of cakesicle molds with more melted candy melts/white chocolate. Chill and then remove from molds. Decorate.
- Store cakesicles in an airtight container at room temperature for up to a week.
View Web Story for this recipe.



Comments
No Comments