
There comes a time when stepping away from the computer, TV, and all electronic devices becomes absolutely necessary. Lately, I feel like every gadget I own hasn't been cooperating with me and it's getting quite frustrating. The camera, gmail, twitter on my iphone... You know, the important things in life 😉 One thing I can always count on to never fail me is a good old arts and craft project. Every once in a while I'll peruse Martha Stewart's craft section on her website. I'm the first to admit some of her projects can seem quite intimidating but I found one for a giant paper poppy flower that had a video, so at least I'd be able to see each step develop. For some, arts and crafts is nothing but a pain in the you-know-what, but it somehow soothes me when my mind is racing and nothing else seems to be working!
Why do I need a giant paper flower, you ask? I don't really know. Sometimes a girl just feels like playing with some pretty paper. But if you make a bunch of them they'd be great centerpieces for a dinner party or you can make a smaller version for gift wrapping or artwork!
For this project you need:
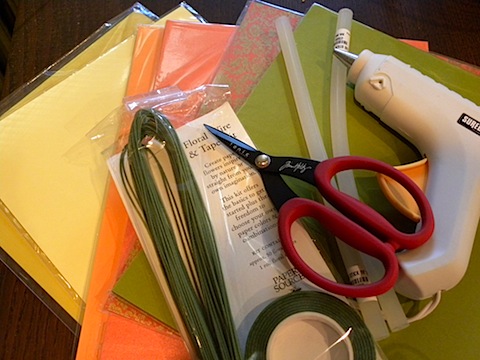
• Petal template
• Colored cardstock (about 3 different colors)
• Scissors
• Pencil
• Skewer or bone folder
• Glue gun and hot-glue sticks
• Heavy-gauge wire or floral wire for stem (optional)
Here's what you do (makes 1 flower):
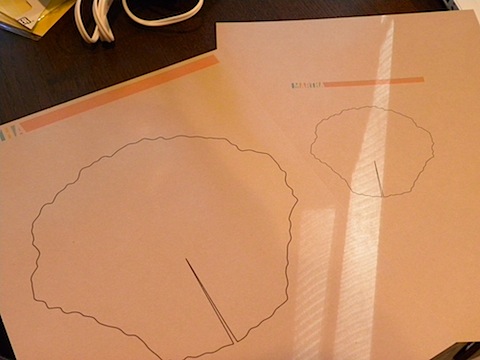
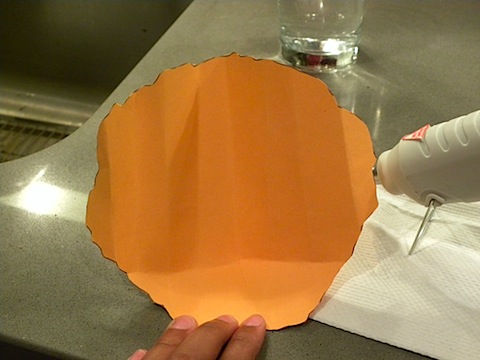
• First, print the petal template on heavy cardstock. While I had the file opened, I also printed a template at 50% so I can make some smaller poppys at a later time. On the colored cardstock, trace and cut 7 petals.
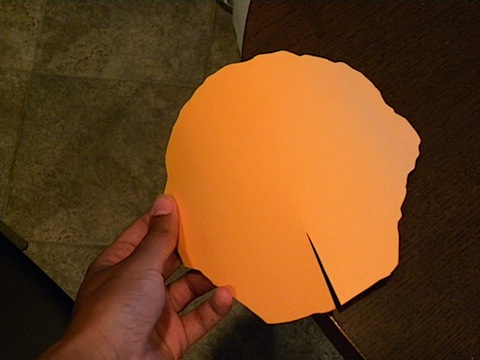
• With two hands, drag the paper over the edge of a table to loosen the fibers, which makes the paper a bit softer and more manageable while assembling the flower.
• With either a skewer or a bone folder, create creases in each petal. You can create as many or as few as you desire. As I started working on the creases, I found it was just as simple to create them by hand by gently folding the paper. All you're doing is just making accordion folds throughout each petal.
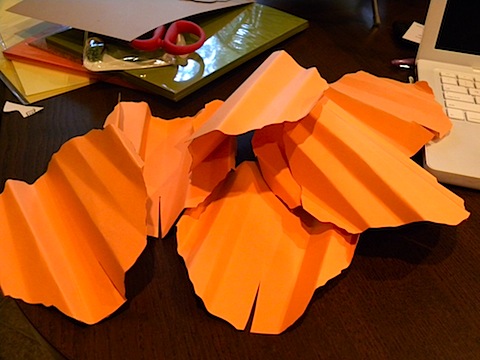
• Next, bend and overlap the base of one petal, then another, adhere each petal using the hot glue gun. Repeat with a third petal. See video for a better visual, if needed!
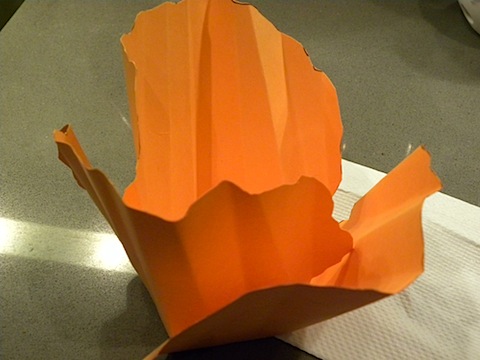
• Use the glue gun to attach the remaining 4 petals around the outer part of the central petals, to create a flower.
📧 Email Me This Recipe
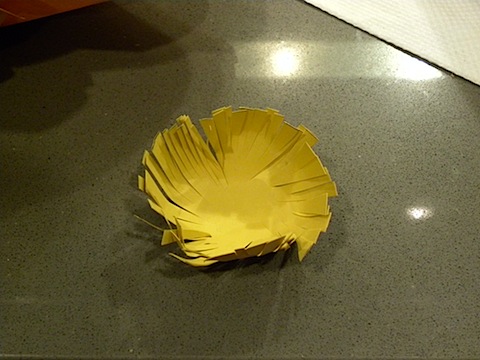
• Cut a 6-inch circle from a different piece of colored paper and fringe with scissors all the way around. Cup the circle in your hands and curl the edges upward. Glue this into the center of the poppy.
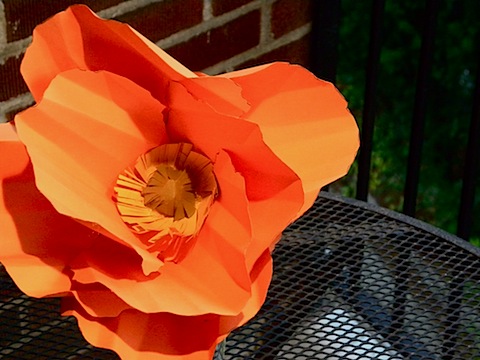
• You can also cut a 4-inch circle from another piece of colored paper and fringe all the way around, as you did for the 6-inch circle, but instead, glue the fringes facing down, to complete the center of the flower.
• If you choose to use a stem, you can punch a hole in the bottom of the flower using an awl (or large needle), and pull floral wire through. Another option would be to wrap a thick wire with green paper and adhere it to the base of the flower.
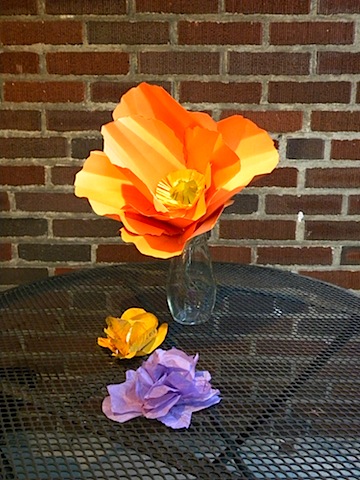
While we're on the topic of paper flowers, while we were at the BCAE working on our cooking demos, I saw a bunch of tissue paper flowers lining a window sill. In typical "me" fashion, I had to know all about them. Our friend Dustin gave me a brief lesson on how to make them. Using a rough template (just sketch a flower with 5 petals), cut out as many tissue paper petals as you wish. I think I used about 5-7 for the purple flower below. Stack each layer, and with a glue gun adhere each layer or stack all petals and staple in the center.
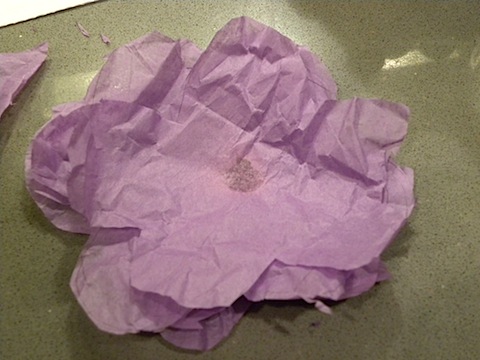
From the base of the petals, crunch each layer upwards, to create a flower.
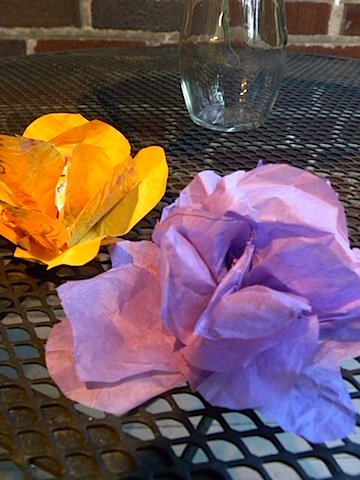
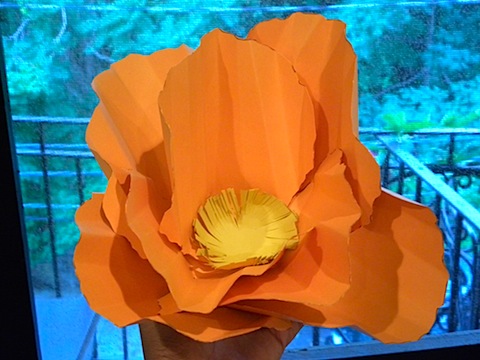
All the paper flowers together:
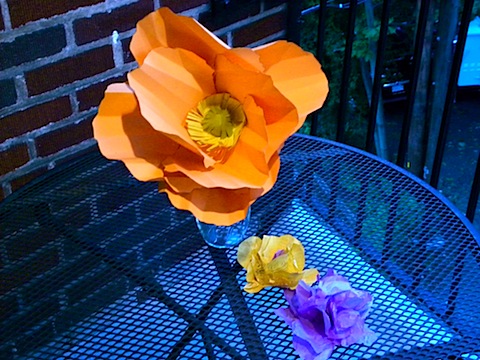

This is definitely one of those projects where practice makes perfect. There are so many different ways to create different versions of these flowers... just think of all the colored paper you can use! (and, I'm a geek.) I'm excited to make more of these because I really, really, really loved this project. Until I realized I had to get back on my laptop to blog about it! So much for staying away from electronic devices for a while 😉
Do craft projects soothe your mind or stress you out? What's your favorite crafty project to work on?
Hope everyone enjoyed the long weekend!
[Chels]
Nicci (Nifty Eats) says
I love scrapbooking to relieve stress & just relax! I love your pretty flowers
Sharlene says
So cute! I'll have to admit I used to be a crafty gal but ever since life got super busy I haven't done so much and haven't the slightest idea where my once beloved glue gun is. It is definitely a nice feeling to finish a project though. These flowers are beautiful!
Fun and Fearless in Beantown says
I am SO not a crafty person but organizing photos weirdly helps me de-stress!
Sarah @ Aubergine says
This makes me want to go out, buy cardstock and get crafty. I think I need to tap into my creative side a bit more...
Love how your flower looks on your table. 🙂
Joanne says
Fun! I love arts and crafts. I own tons of crayons and markers and def don't get to use them enough! Way to stop and smell the roses 😛
Emily @ The Happy Home says
that's so pretty! they'd be gorgeous thumb-tacked to a wall to create a sort of collage on an empty space. i used to craft a lot more, but haven't in some time. might have to get back on it!
Kelly says
This is embarassing but although I love craft projects, they stress the hell out of me. I guess I am too much of an OCD perfectionist.
Juliana says
Wow, how lovely the flowers...they are adorable and so pretty...
Sassy Molassy says
Oh, I love that! Such a cute idea. I bought a fabric poppy from JCrew to pin onto a dress this summer and it was so fun to wear.
bridget says
they're so cute.
Des says
These are beautiful! Wonder if any future brides (with bad allergies) would consider them as centerpieces or a bouquet? hmmmm- perhaps.
Really great color combo too!
saz says
OMG they are soooooooooooooo cute!!! (:
I love them <3