
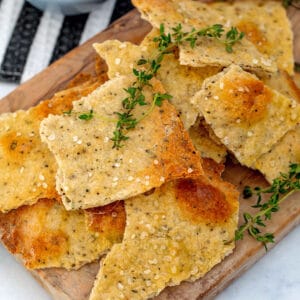
Homemade crackers couldn't be easier to make! These Black Pepper and Thyme Olive Oil Crackers are made with a simple dough that's rolled out thinly and baked before being broken up into rustic-style crackers.

Jump to:
This recipe was originally published in March 2012, but has been updated with new photos in 2021.
You know those foods you eat and then you can't stop eating? Like cookies? And Smartfood popcorn? And Mini Cadbury Eggs? Well, I'm the same way with crackers. Goldfish, Wheat Thins, Cheez-It... You name it. If it's a cracker, I'm here for it. Like the whole bag of it.
And while, it's probably better to overdose on crackers than cookies, it's still not fabulous. So, I figured if i"m going to overdo it, I may as well overdo it on a cracker that's homemade and packed with delicious ingredients.
Believe it or not, crackers are incredibly easy to make at home. These ones are extra simple because you bake them rolled out and placed on a sheet pan and then just break them up when they come out of the oven.
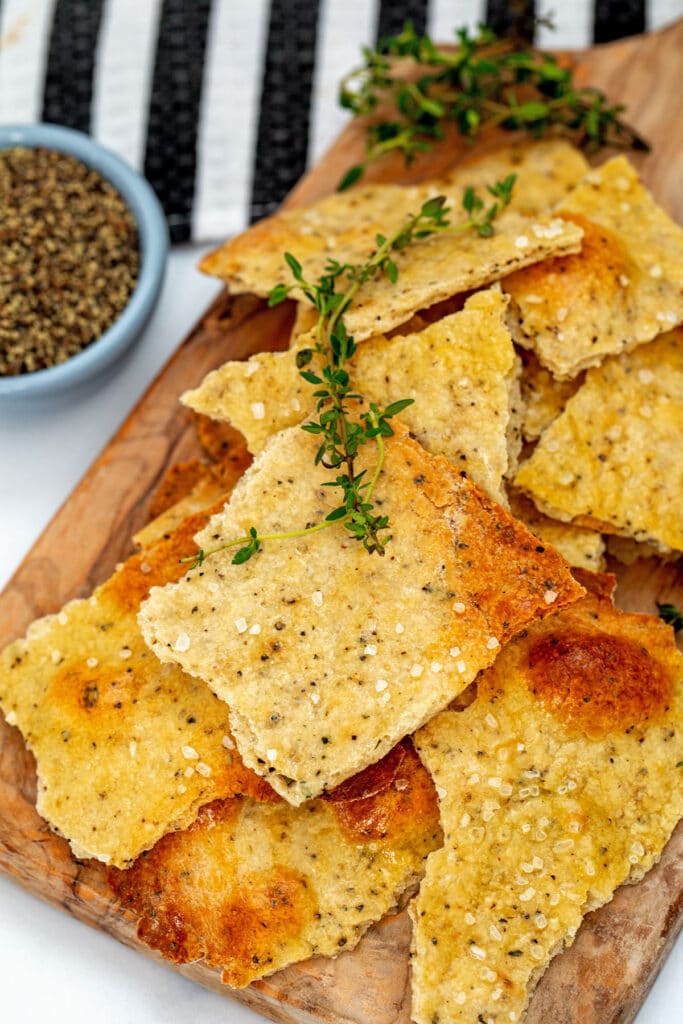
They have a beautiful rustic look and are perfect for serving on any charcuterie board or cheese plate. They'd also be great with these charcuterie cups.
👩🍳 How to make black pepper and thyme olive oil crackers
Like I mentioned, these homemade crackers are easy! They consist of a simple dough that needs to be chilled and then rolled out as thin as possible. Then just place it on a sheet pan and bake it until crispy before breaking up into pieces.
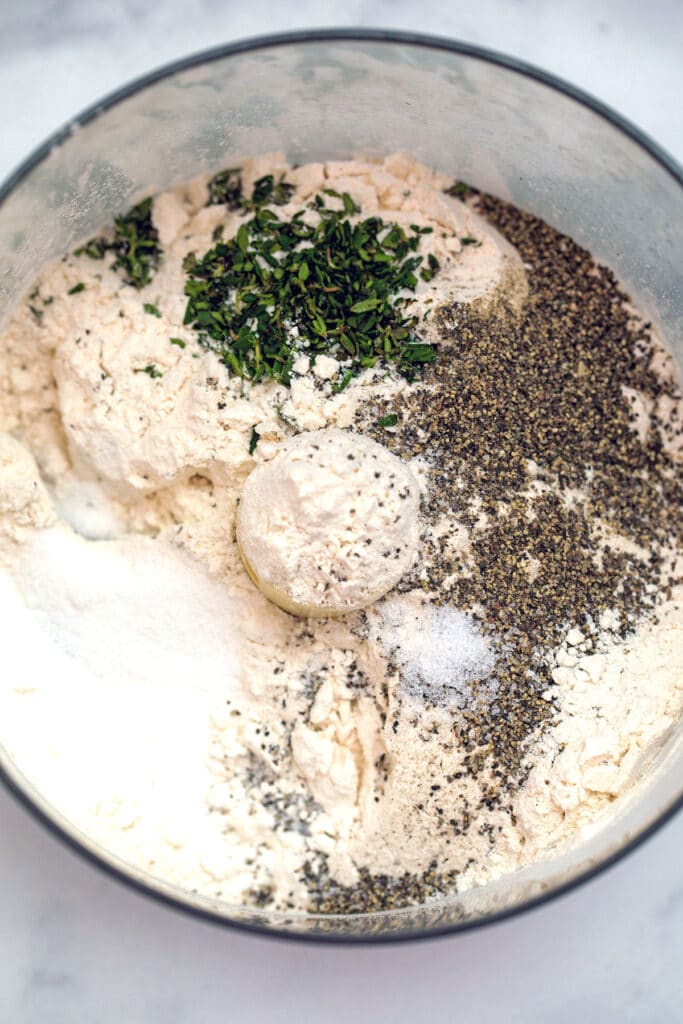
Get out your handy dandy food processor (if you don't have one, you can totally do this in a bowl using a pastry blender or simply a wooden spoon). Add flour, pepper, thyme, sugar, and salt to the food processor and pulse to combine.
Then pour in the olive oil and pules a few times to make sure it comes together.
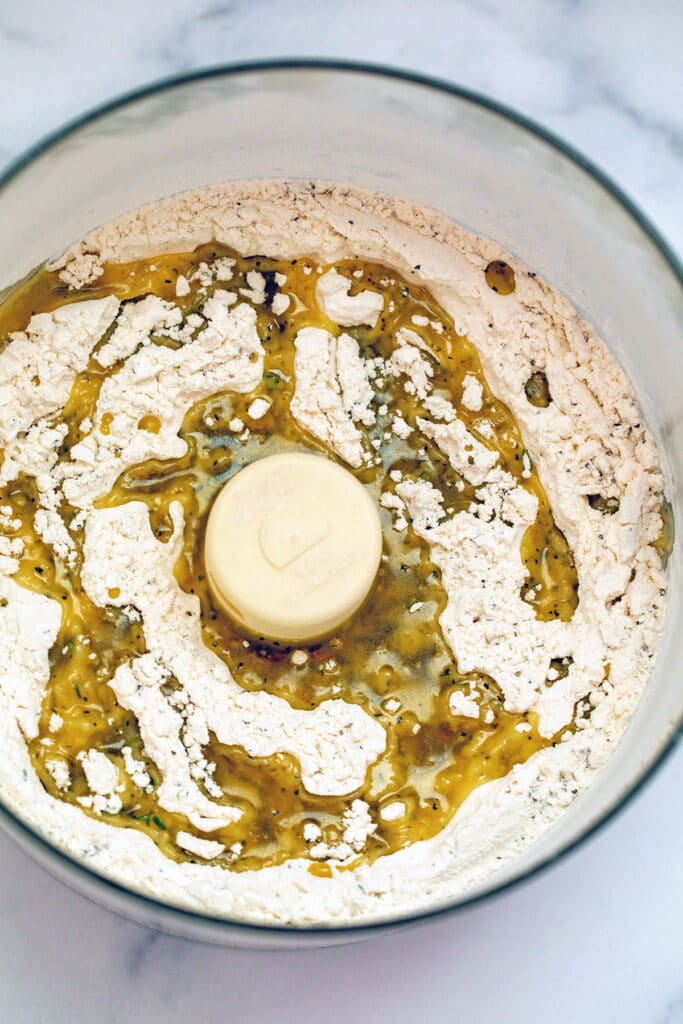
With the food processor on, pour in the milk and blend until a loose ball is formed.
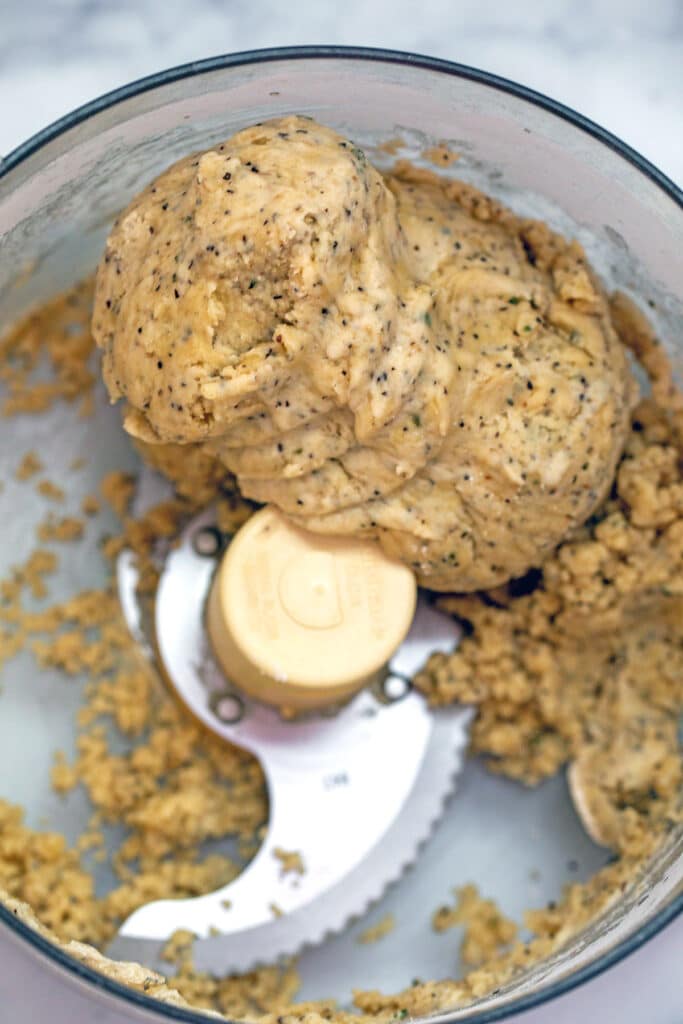
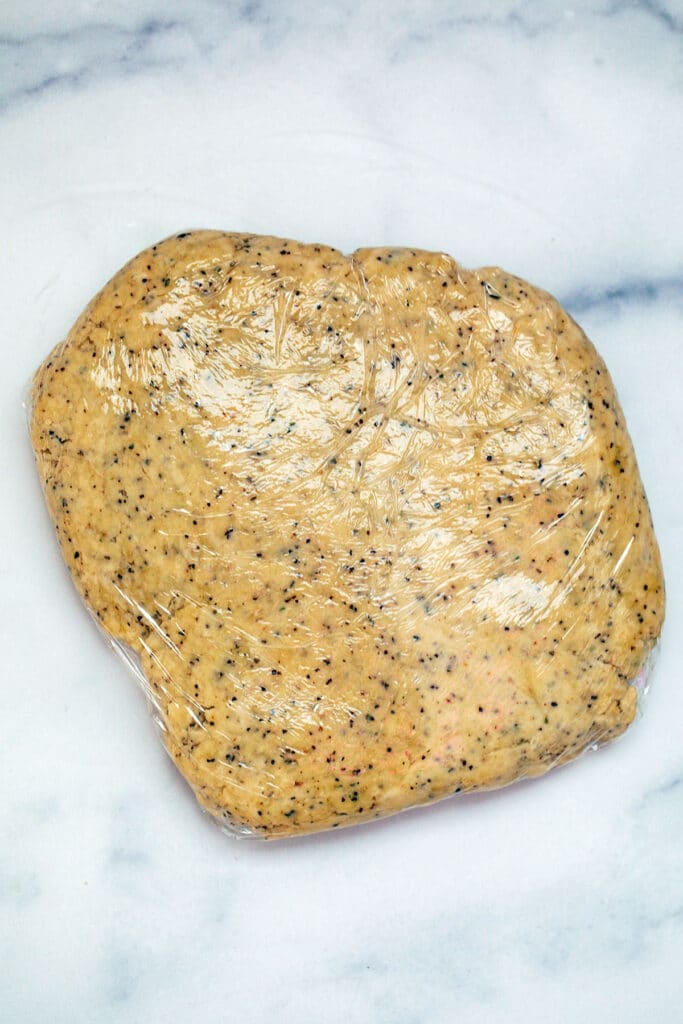
Take the dough out of the food processor and wrap in plastic wrap.
Chill the dough for about an hour. This will help with rolling it out.
Now, pre-heat oven to 375 degrees and line two baking sheets with parchment paper.
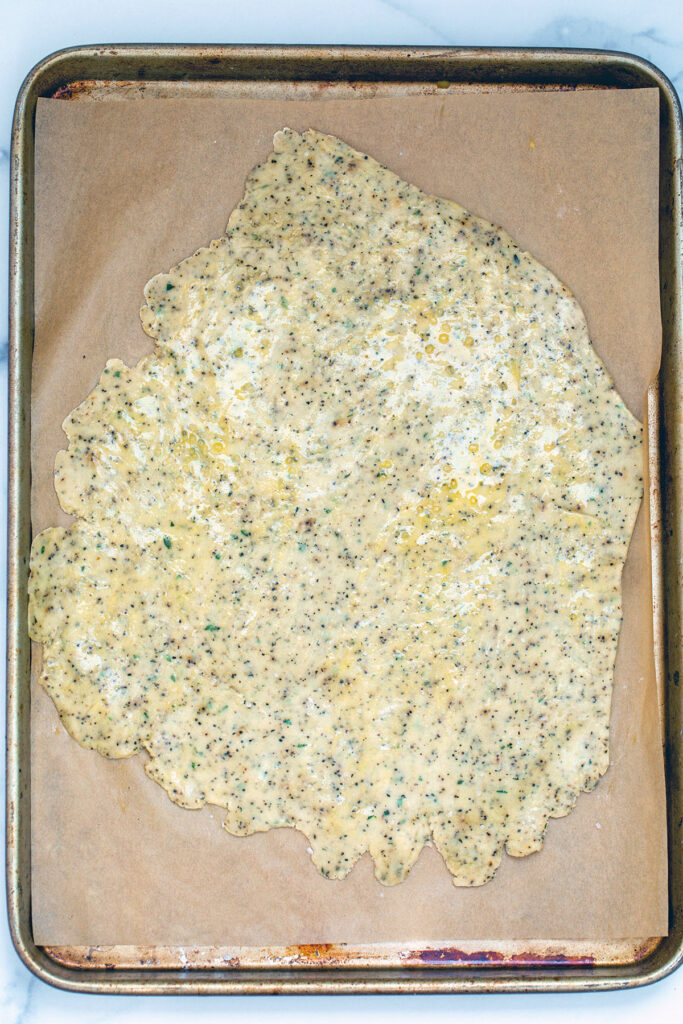
Split dough into two portions. Using one portion at a time, on a lightly floured surface, roll dough out into a large rectangle as thinly and evenly as you possibly can. It should be so thin, you're almost afraid it's going to rip.
Move to your prepared baking sheet. And repeat with the remaining portion of dough.
Dab a little egg wash onto the dough sheets with a pastry brush and sprinkle delicious sea salt on top.
Now bake for 15-22 minutes. Check the crackers at 15 minutes. If they're still pliable and not crispy, return to oven for longer.
📧 Email Me This Recipe
So much of the baking time will depend on how thinly you roll the dough. I find my crackers generally take 18 minutes, but when they're not rolled out as thinly, they take 20.
Let crackers cool completely.
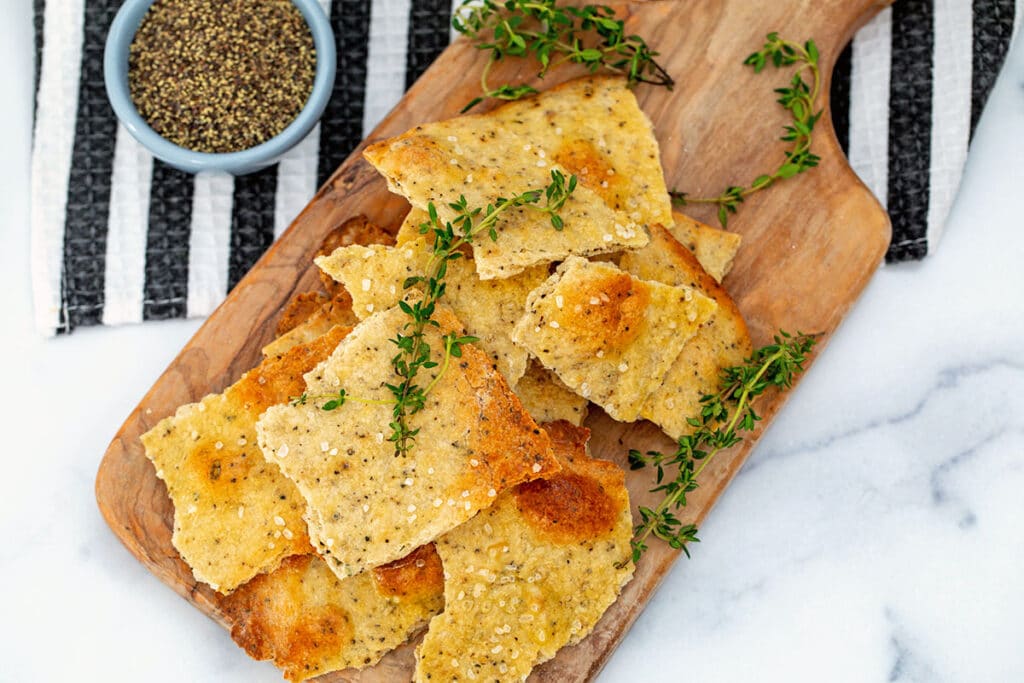
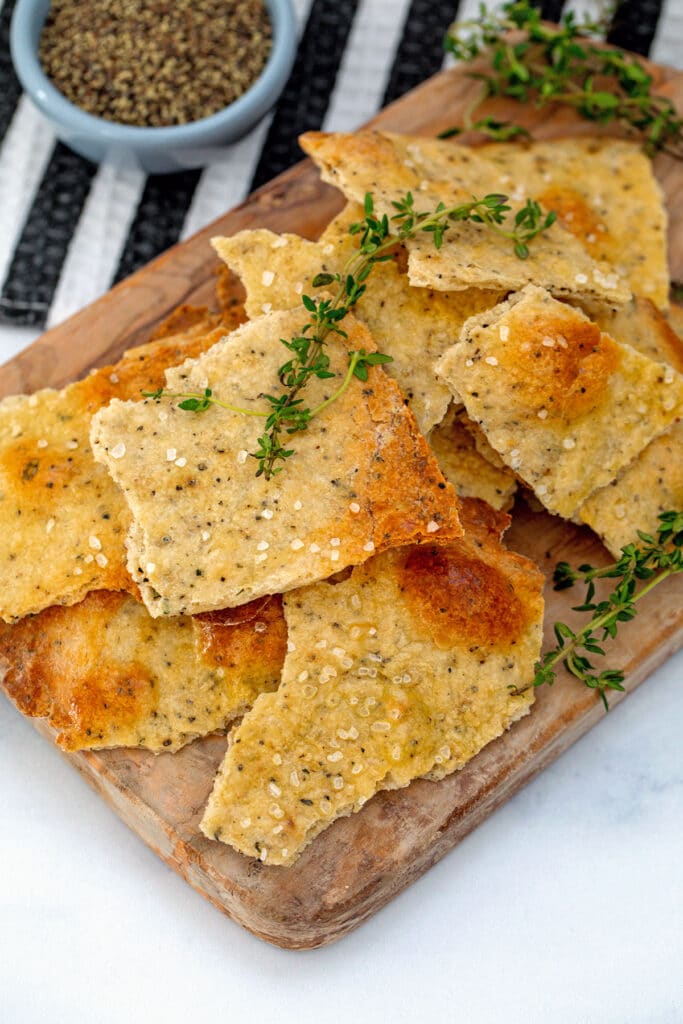
When they're cooled, break the crackers into any size you want. I loved the sort of rustic look of all different sizes. They look so fabulous on cheese boards.
💁♀️ Tips for making olive oil crackers
Though these crackers are super easy to make, a few tips will help you make them perfectly every time:
- Chill dough before rolling: It is possible to make these crackers without chilling the dough if you're in a time crunch. But chilling it for an hour will make it easier to roll out and prevent ripping.
- Roll dough out as thinly as possible without letting it rip: The thinner the dough is, the crispier your cracker will be. Dough should almost completely fill a half sheet pan when rolled out.
- Roll dough out as evenly as possible: In addition to rolling it thinly, you want to roll it evenly, otherwise some areas will burn in the oven and some will be undercooked.
- Keep a close eye on the crackers as they're baking: You don't want the crackers to burn, but you do want them to be extra crispy. So, be sure to check crackers after 15 minutes and determine if they need more time.
- A few air bubbles are OK: As your crackers bake, they may form some air bubbles. This isn't a huge problem, but if you don't like them, simply check the crackers after 5 minutes of baking and poke holes in the bubbles with a knife.
- If you don't like the rustic look: Cut crackers into strips or squares before placing on parchment paper-lined baking sheet. You could even cut out shapes with cookie cutters.
Love at first bite! These olive oil crackers are so light and crispy and yes, pretty tough to stop eating. But at least you know every ingredient that goes them. That made me feel a bit better about eating half a batch.
I finally decided to take a break on cracker snacking and then Chris came downstairs and almost finished off the batch. I kept hearing him say, "just one more..."
🎉 Variations on crackers
Once you get the basic cracker recipe down, there are so many variations you can make on it. Before you know it, you'll only be serving homemade crackers at your gatherings! Here are a few ideas for variations on this recipe:
- Swap out thyme for other herbs, like rosemary, parsley or sage.
- For a kick, add in spices like paprika or cayenne.
- Utilize seasonings like ranch or garlic powder.
- Experiment with using different types of flour.
- Cut crackers into different shapes before baking.
I love that these olive oil crackers are packed with black pepper flavor and a touch of thyme. And that they're extra crispy. The flavor is incredible and they go with so many things.
If you're looking for another fun cracker recipe, try these Smoked Cheez Its!
🍽️ What to serve with
I'm totally happy eating these crackers as is. But everyone knows that crackers and a good dip are a match made in heaven. And soup, too. Here are some of my favorite options for serving with black pepper and thyme olive oil crakcers:
- Bacon Blue Cheese Spinach Dip
- Bacon White Pizza Dip
- Chilled Mexican Corn Bisque
- Sweet Potato Curry Dip
- Caramelized Onion Goat Cheese Dip
- Lentil Soup
- Healthy Black Bean Dip
- Kalamata Olive Dip (from Sweet Caramel Sunday)
- White Bean Hummus (from Chisel & Fork)
Basically, you can't go wrong with serving these crackers at a party or putting them in a lunchbox or simply eating them at home for an afternoon snack.
I'm officially a make-your-own crackers convert and I can't wait to experiment with tons of other types of crackers!
Have you ever made your own crackers?
📖 Recipe
Black Pepper and Thyme Olive Oil Crackers
📧 Email Me This Recipe
Ingredients
- 2 cups all-purpose flour
- 1 tablespoon cracked black pepper (tellicherry is best)
- 1 teaspoon fresh thyme, finely chopped
- 1 tablespoon granulated sugar
- ¼ teaspoon salt
- ¼ cup extra-virgin olive oil
- ¾ cup whole milk
- 1 large egg white, lightly beaten
- Coarse sea salt, for topping
Instructions
- Add flour, pepper, thyme, sugar, and salt to the bowl of a food processor and blend together.
- Pour in olive oil and pulse a few times so dough begins coming together.
- With the food processor on, pour in the milk and blend until a loose ball is formed.
- Remove dough from food processor and wrap tightly in plastic wrap. Chill dough in refrigerator for about 1 hour.
- Pre-heat oven to 375 degrees and line two baking sheets with parchment paper.
- Split dough into two portions. Using one portion at a time, on a lightly floured surface, roll dough out into a large rectangle as thinly and evenly as you possibly can. The thinner you can get it, the better as it will result in a crispier cracker.
- Lightly brush dough with egg wash and sprinkle sea salt on top.
- Bake for 15-22 minutes, until crackers are getting crispy and turning golden. Check after 15 minutes. If crackers are still pliable and not totally crispy, return to oven, being sure to re-check every 2 minutes.
- Let cool completely before breaking into pieces of whatever size you choose.
Simply Life says
I LOVE that you made your own crackers- and flavorful ones too!
Shannon says
easy and so delicious, these look like they were a great appetizer!!
Michelle says
I made crackers for the first time while taking a class at King Arthur Flour and loved how they turned out. Can't wait to hear about the wedding food!
Blog is the New Black says
These crackers look wonderfulllll!
Bianca @ Confessions of a Chocoholic says
So cool, I've never made my own crackers - never even thought of it! This definitely looks like something I can handle. And that cheese plate looks awesome!
Cara says
These look so delicious! My husband is a cracker-fiend so I may have to make these for him. They look so light and crispy!
Erica says
ah! 3 months! That is so exciting! Our venue forced us to sit down and eat and kind of kept people away from us for a bit. It was glorious. I can't wait to see all your pictures. The crackers look just perfect. I've only homemade crackers once and they were fantastic
Kelly says
I love the rustic look of those crackers. I haven't made my own in quite a while. Your wedding food tastings also sound fantastic and I love that you've told your photographer you want shots of the food! I probably would too.
Michelle Collins says
This whole spread looks amazing! I've never made my own crackers before - just pita chips - but these look ridiculously delicious!
Beth @ DiningAndDishing says
These sound awesome! I love how they're all mismatchy shapes. You can tell they are truly homemade with care!
Megan says
I feel like such a weirdo because I'm also asking our photographer to get plenty of pictures of the food. 🙂 It's important stuff. We did one tasting already and have a second coming up because we ended up changing our menu. I'm finding tasting everything one of the best parts of wedding planning! Good luck with everything you have left to do!! The crackers sound delicious!
Claudia says
I am a cracker fiend and I don't make them nearly enough. Thyme? Olive oil? I am so there.
Sarah @ Semi-Sweet says
How did you not eat those all up before your party? Bookmarking these for Easter appies - thanks!
Daisy says
I made my own crackers at a baking class once. But never after that....
yours sound tasty, especially with all that delicious cheese!
Cooking with Coley says
I can't believe you made these. I am SO impressed and maybe a little jealous. I need to get more ambitious and give these a shot.
Emily @ A Cambridge Story says
Love all the pepper in these crackers! I'd love to see homemade Cheez Its!
Dana says
I LOVE the towel that the crackers are on! Do you mind sharing where it's from?
Sues says
@Dana- The towel is from Crate and Barrel. I didn't get it too long ago, so I'm pretty sure they still have them! They come in a few different colors 🙂